
Windows 10 Won’t Boot or Start? Try Easy Fixes
Windows 10 Won’t Boot or Start? Try Easy Fixes

If you have successfully updated your OS to Windows 10, and you find that your computer refuse to boot normally, you’re not alone. Many Windows users are reporting this problem as well. No need to feel panic when your computer is suddenly not booting normally, frustrating as it is, we’re here to help you out. Here we have 6 of the most effective solutions for you to try. Try them one by one from the top down until you find the one works for you.
Why is my computer not booting?
There could be many different reasons why your computer is not booting or starting right, for instance, if you have bad firmware, faulty software or failed hardware alone or combined could be the culprit.
However difficult it may seem to start when your computer refuse to boot, there is no reason for you to despair. The silver lining is, Microsoft has spent a lot of time and energy to make Windows easy to fix, almost to the point where it’s actually self-repairable.
How do I fix my not booting computer?
To fix this problem, here are some of the most effective methods that you can try. As mentioned, you don’t have to try them all; just pick from the list the options you have tried and then work until you hit the jackpot for you.
Step 1: Check the Power Supply
Step 2: Remove External Devices
Step 3: Perform a Hard Reboot
Step 4: Perform a system restore
Step 5: Run Disk Check
Step 6:Refresh or Reset your computer Refresh
IMPORTANT : We focus on software triggered Windows 10 not booting problem here in this post only. If you suspect that the problem is with your hardware, we recommend that you ask your computer technicians for further assistance.
Step 1: Check the Power Supply
Turn on your computer. If you cannot hear fans starting and cannot see anything on the screen, please follow the steps bellow to check the status of your power supply and make sure that it is problem-free.
- Forlaptop users , please follow the instructions below to check your power supply.
Double check to make sure that the charger is the right one for your laptop. Many laptops, especially laptops from the same manufacturer, use the same size plug. If you have more than one laptops, it is easy for you to plug in the wrong power supply.
Use a spare cable to see if it is the problem of your fuse in the plug. If you don’t have a spare power cable, please use a screwdriver to remove the fuse and install one that is known to be good.
Check the wire. If your power supply is beaten up, especially if you can see the colored wires inside the black outer protection, it could be time to buy a new power supply unit.
- Fordesktop users , please follow the steps below check your power supply.
Double check the power cable to make sure that it is plugged in and the outlet is working.
Ensure that the power switch on the back of its case, on the power supply, is set to the On position. If it still won’t power on at all, it’s possible you disconnected a power cable inside its case. If you haven’t been messing around inside the case, it’s possible the power supply is dead. In this case, you’ll have to get your computer’s hardware fixed or get a new computer.
Be sure to check your computer monitor. If your computer seems to power on but your screen stays black, ensure your monitor is powered on and that the cable connecting it to your computer’s case is plugged in securely at both ends.
Step 2: Remove External Devices
Remove or disconnect all unnecessary discs and devices from the computer. Make sure that the computer isoff , and then remove any discs and USB devices and the memory cards from the card reader slot. Disconnect non-essential devices such as camera, MP3-playersprinters, scanners, external hard drives etc., and leavemouse ,keyboard andmonitor connected.
Turn on the computer. After you have removed the devices mentioned above, turn on the computer.
If your computer starts well, reconnect the devices back on one by one. This will help you figure out which device is causing the problem.
If your computer won’t start and the same problem exists, press and hold the power button to turn off the computer. Please make sure that you don’t connect any external devices to your computer for now.
Step 3: Perform a Hard Reboot
If youCANNOT log into the Windows 10, you can perform a hard reboot on your computer. This will allow you to go to theAdvanced options page, where you are able to perform a refresh or a reset of your Windows 10.
Warning : Please do not try this when your computer is at a good state. Restarting a computer without support of operating system could result in data loss, incomplete installations and suspension and corruption of any processes that were running before the reboot.
Press and hold the power button on your computer until it powers off.
Press the power button on your computer to turn it on.
Repeat step 1) and 2) until you seePlease wait during the boot. It usually takes three repeats (more than three repeats if this is not the first time that you did this) for it to come up. You need to try until you can see thePlease wait coming out.

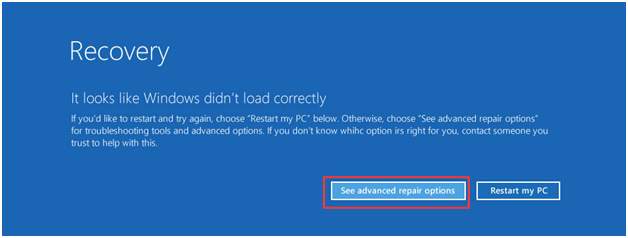
- When the following page shows, tab or clickSee advanced repair options .
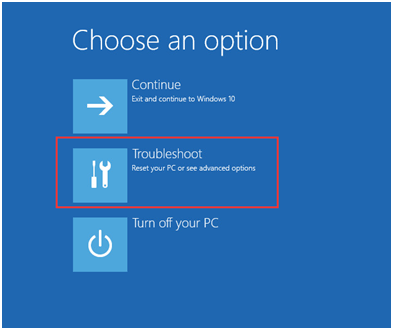
- ChooseTroubleshoot.
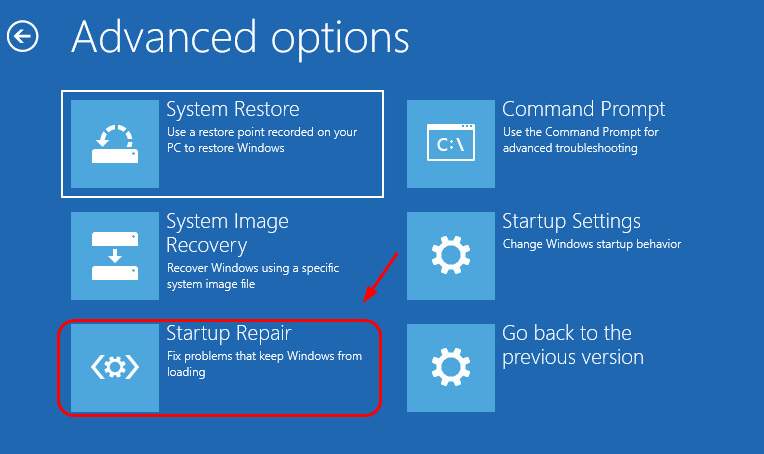
- Then you will be seeing a page similar to the following one. You could chooseStartup Repair since your computer refuse to load. (You can also do asystem restore if you have previously created a system restore point.)
Follow the on-screen instructions to continue with the system repair.
Your computer will reboot automatically if the repair goes well. And you should be able to see the login screen when the self-repair finishes.
Step 4: Perform a system restore
When you have successfully booted into the Advanced repair option page, there is another thing that you can do: do a system restore, on the basis that you have turned this feature on previously. Here is how you do it:
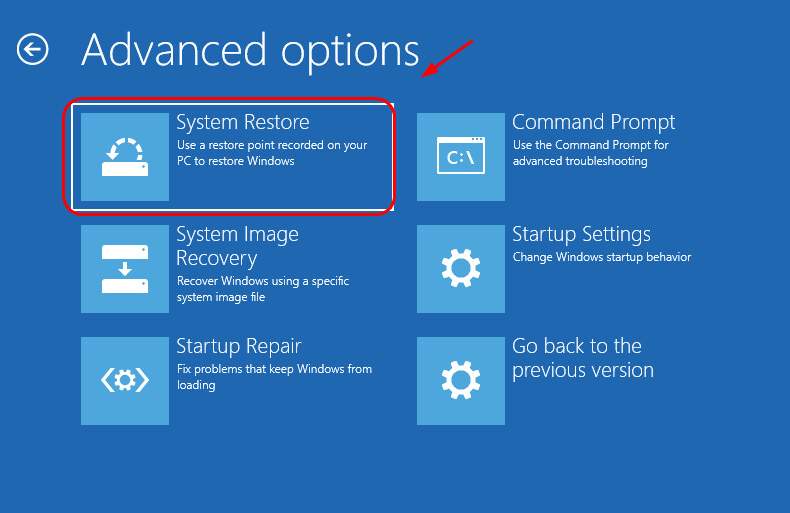
- Repeat step 1) to 5) in the above method. When in the Advanced options page, clickSystem Restore .
- Follow the on-screen instructions and choose a restore point for you to go back to.
NOTE : If you have not created a restore point, or that you didn’t manually turn on the system restore point feature in Windows 10, you might see this instead:
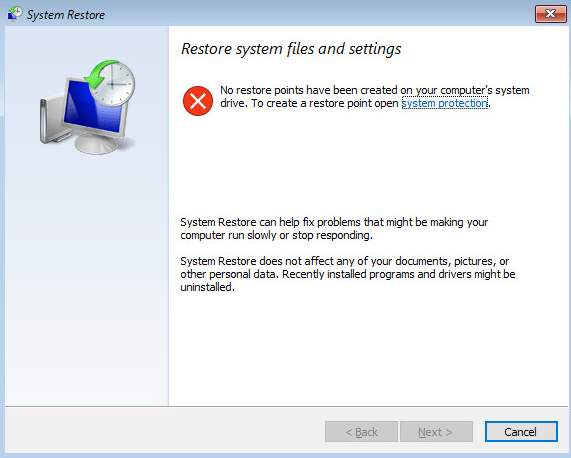
In such case, you may need to use a recovery disc or a USB drive to boot, provided that you manage to get the installation files for Windows 10 from other sources.
Step 5: Run disk check
This method has been proved by a big number of users to be effective. So we think you may want to have a try:
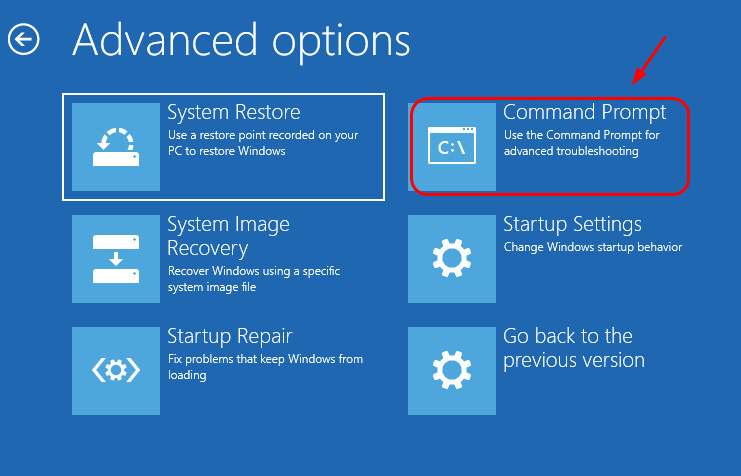
- Do a hard reboot on your computer, and clickCommand Prompt when you are here:
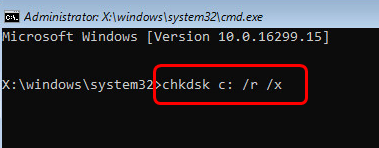
- In the Command Prompt window, type
chkdsk c: /r /x
and press theEnter key on your keyboard.
- Wait for the scan process to finish.
Your PC should be able to boot now. If not, you may need to consider do a system reset or refresh.
Step 6: Refresh or Rest your computer
A refresh on Windows 10 will help you reinstall Windows 10. However, it will remove the applications and drivers that you have installed and your personal settings will be changed back to default as well. It will also remove applications from your computer manufacturer but the apps you installed from the Windows store will remain.
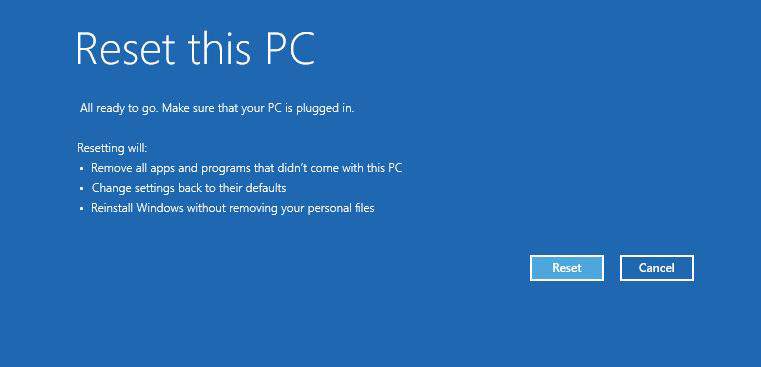
A reset on Windows 10 will help you reinstall Windows 10 and removes ALL your personal files. The drivers, the applications, the personal changes that you made to settings, and the applications installed by your computer manufacturer will be removed as well. However, if your computer came with Windows 10, apps from your computer manufacturer will be reinstalled.
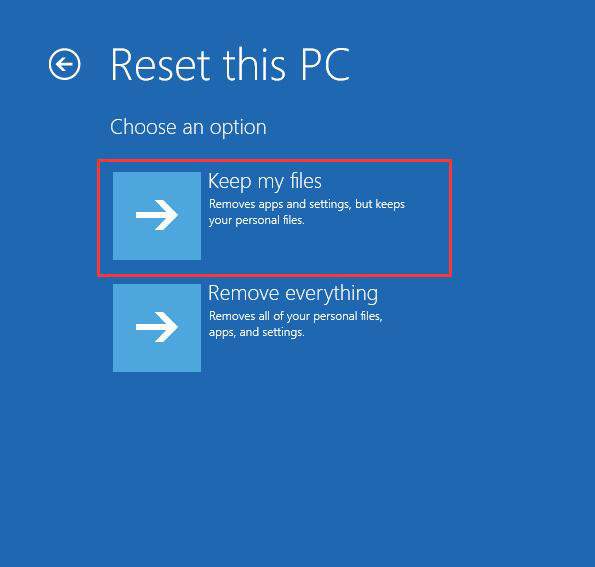
- If you choose to refresh your Windows 10, chooseRefresh your PC option. Then chooseKeep my files .
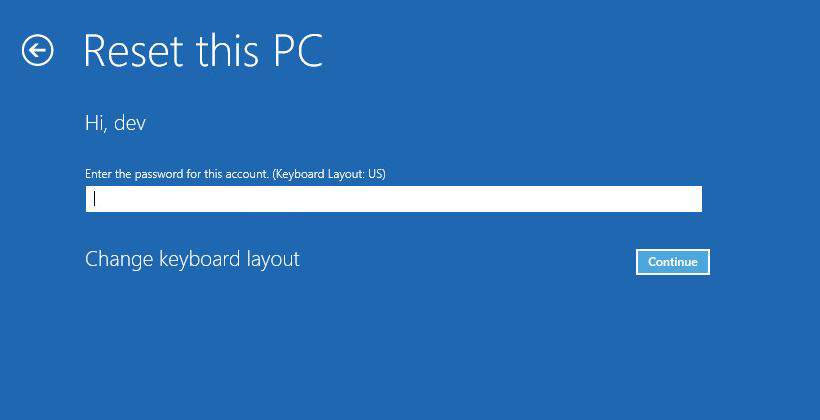
- If prompt, click on the account you want to provide credentials for.
- Press the Reset button to confirm the reset process.
It will take a while for the refresh to start and to finish. Your computer will restart a few times during the process.
You need to sign into Windows 10 when the refresh finishes. You will go through first start up again before seeing the desktop after the refresh.

For more information about resetting your computer from the options listed, please refer to this post here:
Also read:
- [New] Compare & Contrast Leading Online & Desktop GIF Tools
- [Updated] 2024 Approved Top Tricks for Producing High-Quality PowerPoint Recordings
- [Updated] In 2024, User-Friendly Mac Gadget Visuals & Voices Recorded
- [Updated] Stitch Together Photographs The Montage Masterclass
- Azure's Speech-to-Text An Easy Guide
- Effective Steps to Salvage Your Moistened iPhone/iPod - DIY Repair Techniques
- Expert Techniques for Fixing the Critical Blue Screen on Your Computer
- Exploring DAC Technology: Why You Should Consider Adding One to Your System
- High Precision Review of Fugetek's Durable FT-568 Stick - Transform Your Selfies
- In 2024, 5 Ways to Move Contacts From Nokia XR21 to iPhone (13/14/15) | Dr.fone
- In 2024, How to Transfer Contacts from Honor 90 Pro to iPhone XS/11 | Dr.fone
- In 2024, Unveiling VRecorder Download & Install Made Simple
- Is It Possible to Use AirPods on the Nintendo Switch? A Comprehensive Guide
- Is There a Free Alternative to Purchasing Microsoft Word? Absolutely!
- Just Launched: Exploring Apple's Most Recent MacBook Model
- Latest Guide How To Bypass Honor 90 Pro FRP Without Computer
- Securing Your iPhone: A Comprehensive Guide to Enabling Touch ID and Passcode Protection
- Step-by-Step Solution for Missing Mingwm10.dll File
- Watching Harry Potter: The Ultimate Movie-by-Movie Journey
- Title: Windows 10 Won’t Boot or Start? Try Easy Fixes
- Author: John
- Created at : 2025-02-26 17:22:46
- Updated at : 2025-03-02 17:33:52
- Link: https://techno-recovery.techidaily.com/1723808032293-windows-10-wont-boot-or-start-try-easy-fixes/
- License: This work is licensed under CC BY-NC-SA 4.0.