Creating a Bootable Ubuntu Stick with Etcher on Any PC

Creating a Bootable Ubuntu Stick with Etcher on Any PC
Quick Links
- Why Try Linux?
- Why Make a Bootable Linux USB drive?
- What Do You Need to Make a Bootable Linux USB Drive?
- How to create a bootable Linux USB drive with Balena Etcher
Key Takeaways
- Making a bootable Linux USB drive lets you try distros without altering your system, and Balena Etcher makes the process simple.
- After downloading Balena Etcher, download the image file of the distro you want to try and plug in a USB drive you don’t mind erasing.
- Click “Flash From File” and select your Linux image file. After the image writing is complete, boot into the USB drive.
You may have heard about Linux and are curious to try it out. Making a bootable Linux USB drive allows you to test different versions of Linux without making any changes to your computer. It’s also the easiest way to install most versions of Linux. Balena Etcher makes the process of creating this USB drive a snap, and it runs on almost any computer.
Why Try Linux?
While most computers nowadays run either Windows 10, Windows 11, or macOS, there is another major operating system (OS) out there. This OS is Linux.
Broadly speaking, Linux (technically, GNU/Linux ) is a free and open-source OS that runs on laptops , desktops, servers, phones, smart TVs, and practically anything with a CPU in it. In fact, if you’ve used an Android phone or tablet, you’ve already used Linux : Android is a version, or distribution (commonly called a “distro”), of Linux.
For the most part, Linux is very similar to Windows or macOS. Just like Windows or macOS, Linux lets you install apps, browse the web, write documents, play games, connect to networks, and do any other computing task you might need.
Linux has some benefits over the other operating systems. It’s flexible and can be easily tweaked by end users, it is open-source (allowing you to directly see the code that it runs if you’d like), and almost every distro is 100% free of charge.
Why Make a Bootable Linux USB drive?
If you’ve been wanting to give Linux a spin or just want a peek at an alternative OS, making a bootable USB drive allows you to do two things:
First, you can try a Linux distro without installing it over your current operating system. This lets you see if Linux is a good fit for your needs and lets you get used to the OS prior to committing to a full installation.
Second, a bootable Linux USB drive is often the simplest and easiest method of installing a Linux distro. Almost every flavor of Linux has an ISO disk image file freely available, and these images often include a simple installer app that walks you through the installation process. There are actually more reasons to make a bootable USB drive , but those are two reasons are the most immediate if you’ve never tried Linux before.
What Do You Need to Make a Bootable Linux USB Drive?
The method we’ll use to make a bootable Linux USB drive is simple and straightforward. You’ll need a few things:
- An ISO file of the live disk image of the Linux distro of your choice (for this how-to, we’ll be using Linux Mint, but check our guides on the best Linux distros if you need help picking one)
- A PC running Windows, macOS, or Linux (the Linux PC will need to be able to run AppImages )
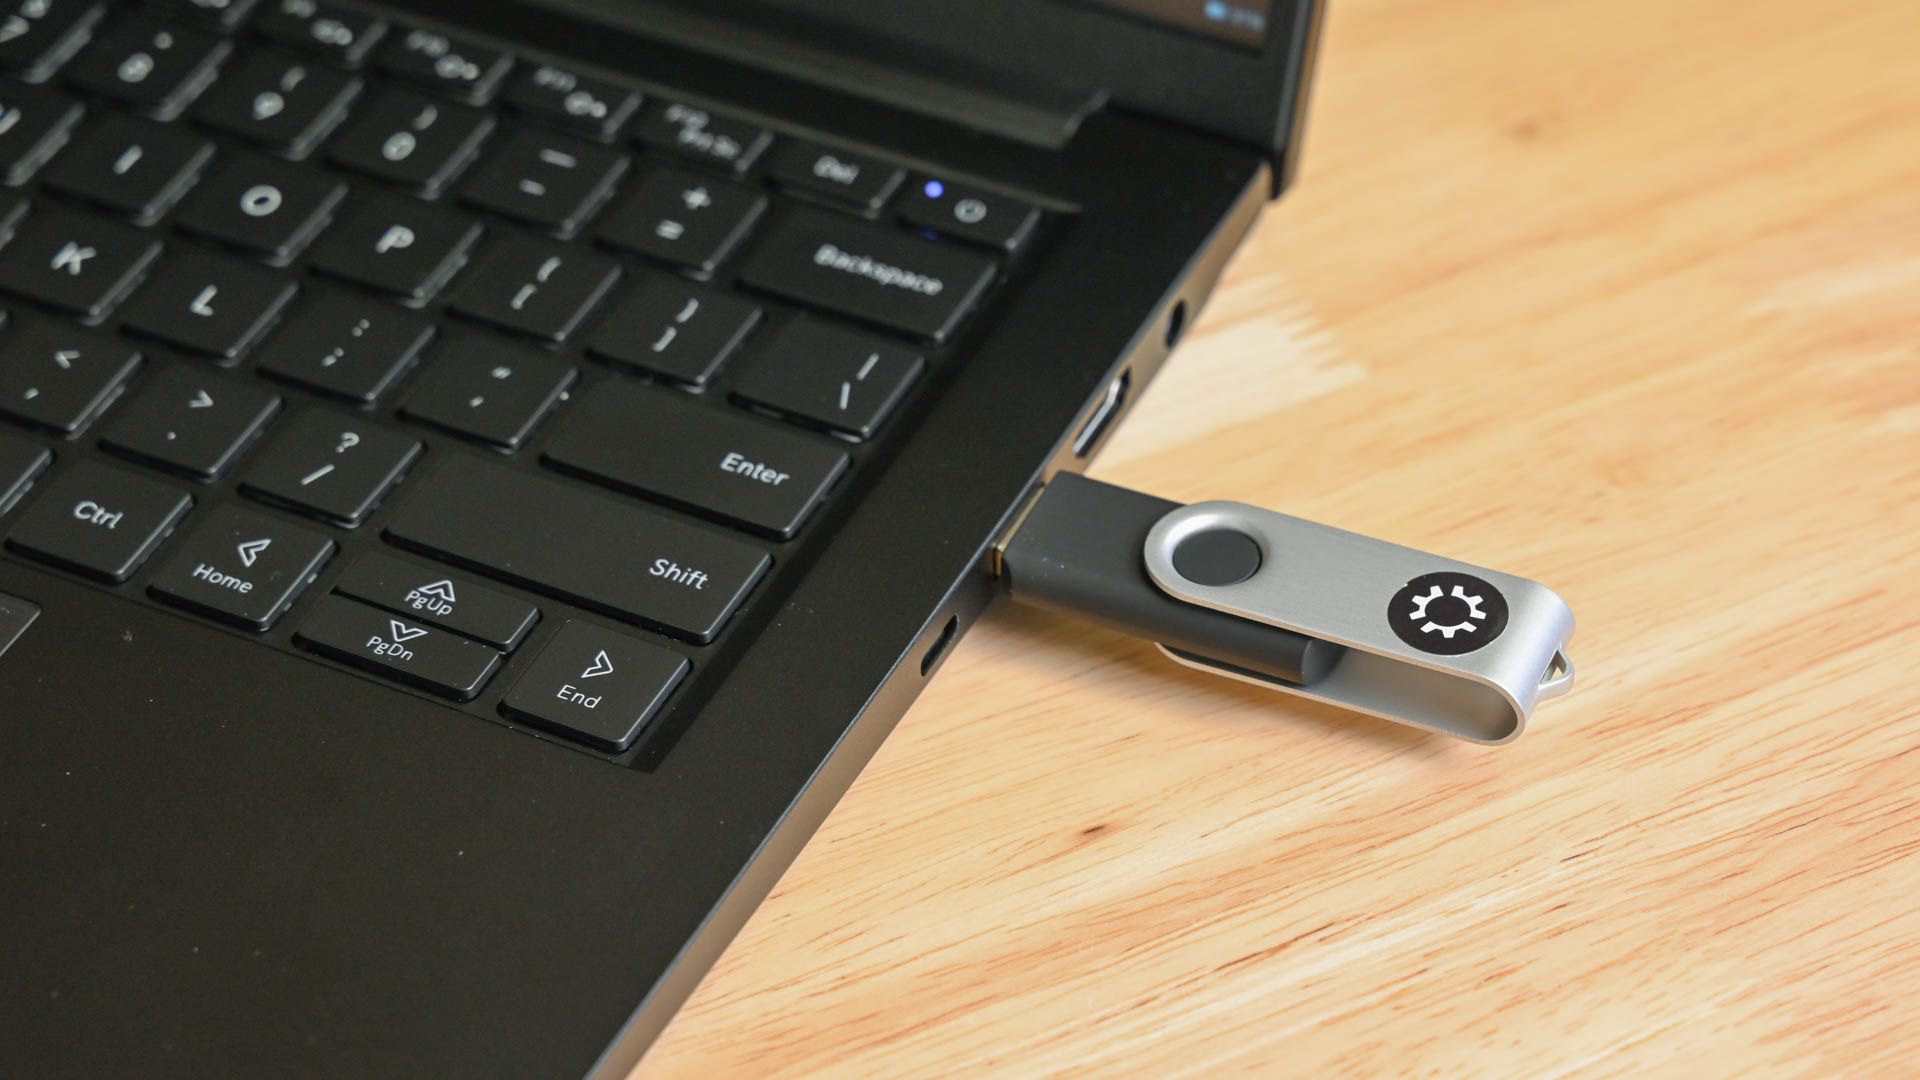
- A USB flash drive with at least 8 GB of storage
- An Internet connection
How to create a bootable Linux USB drive with Balena Etcher
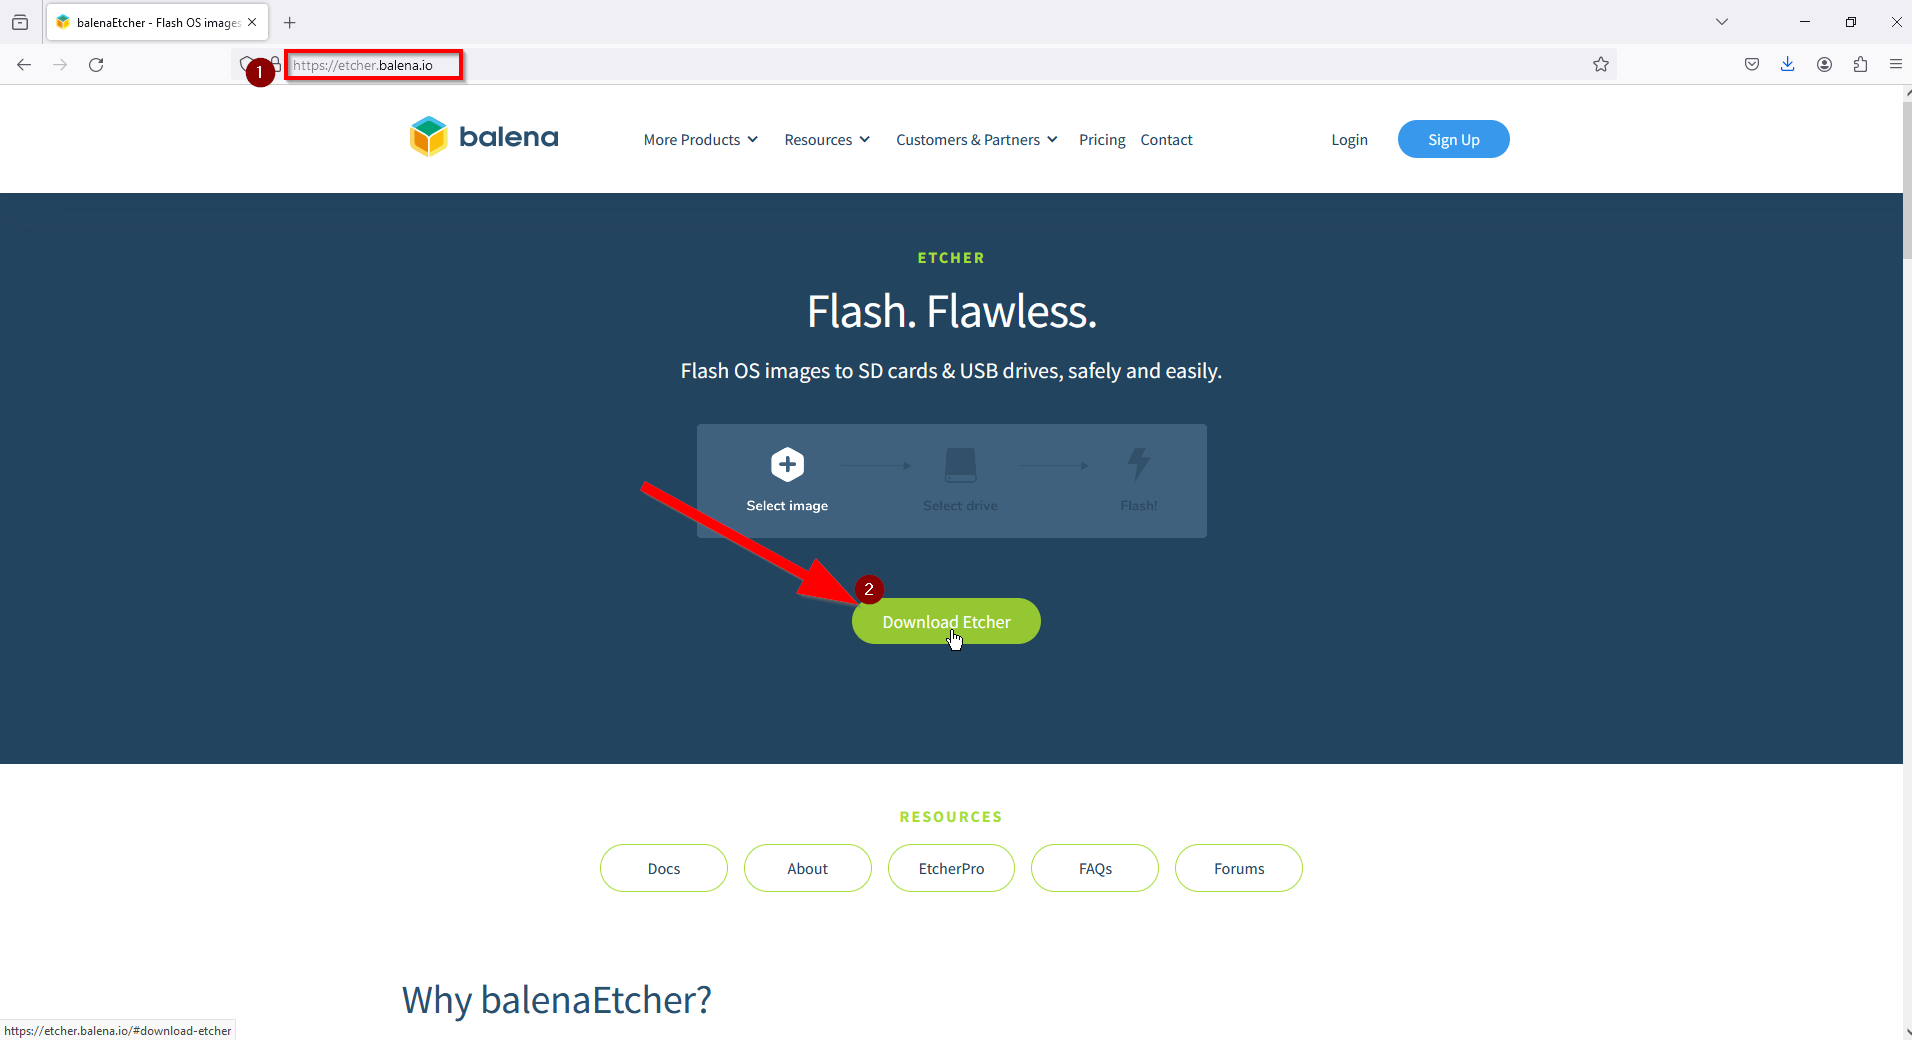
Let’s make a bootable Linux USB drive! To start, make sure your PC is connected to the Internet. Download Balena Etcher for your OS (Windows, macOS, or Linux) from the Balena website .
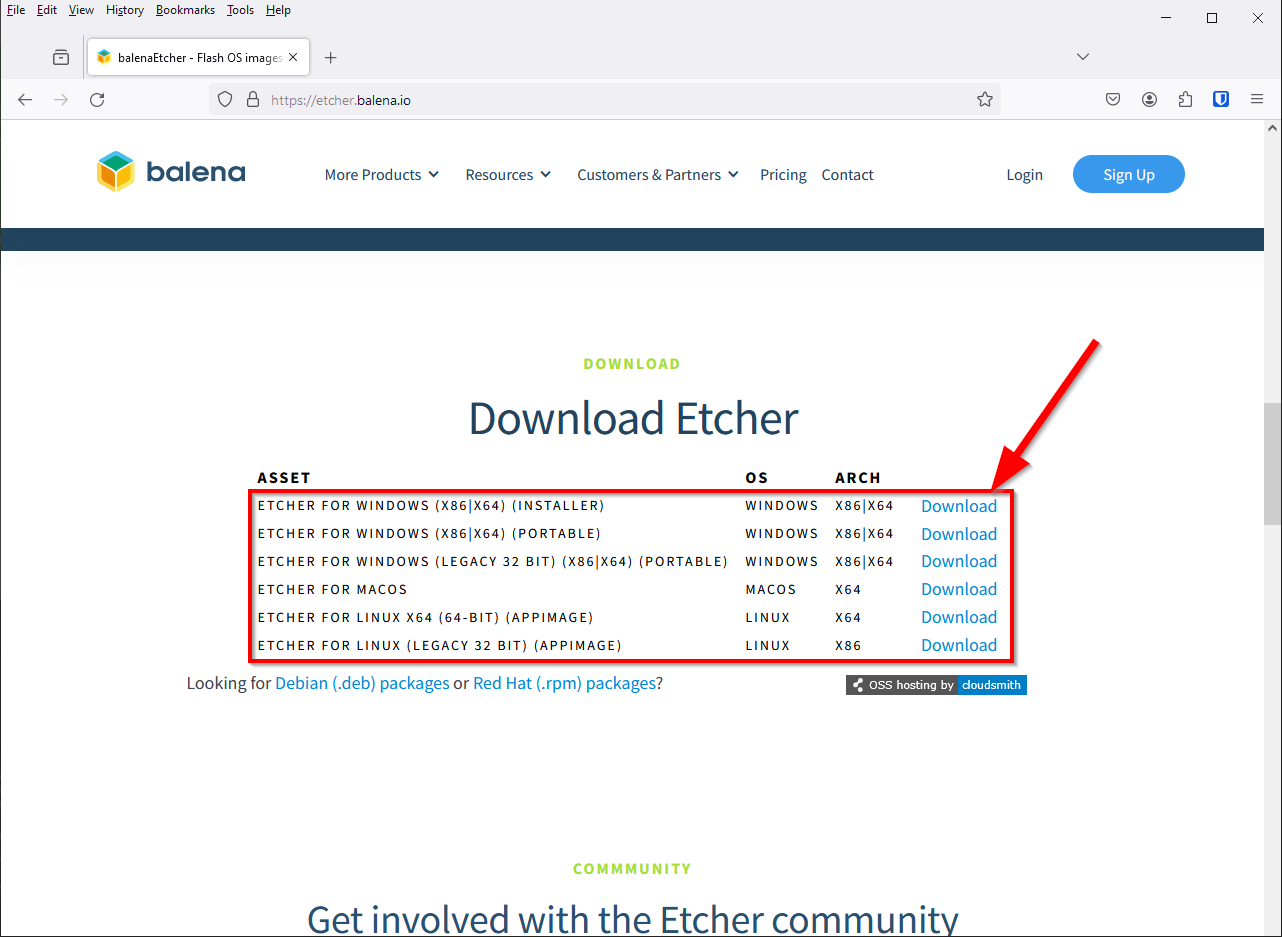
If the website doesn’t detect your OS automatically, you can find all versions of Balena Etcher by scrolling down the page.
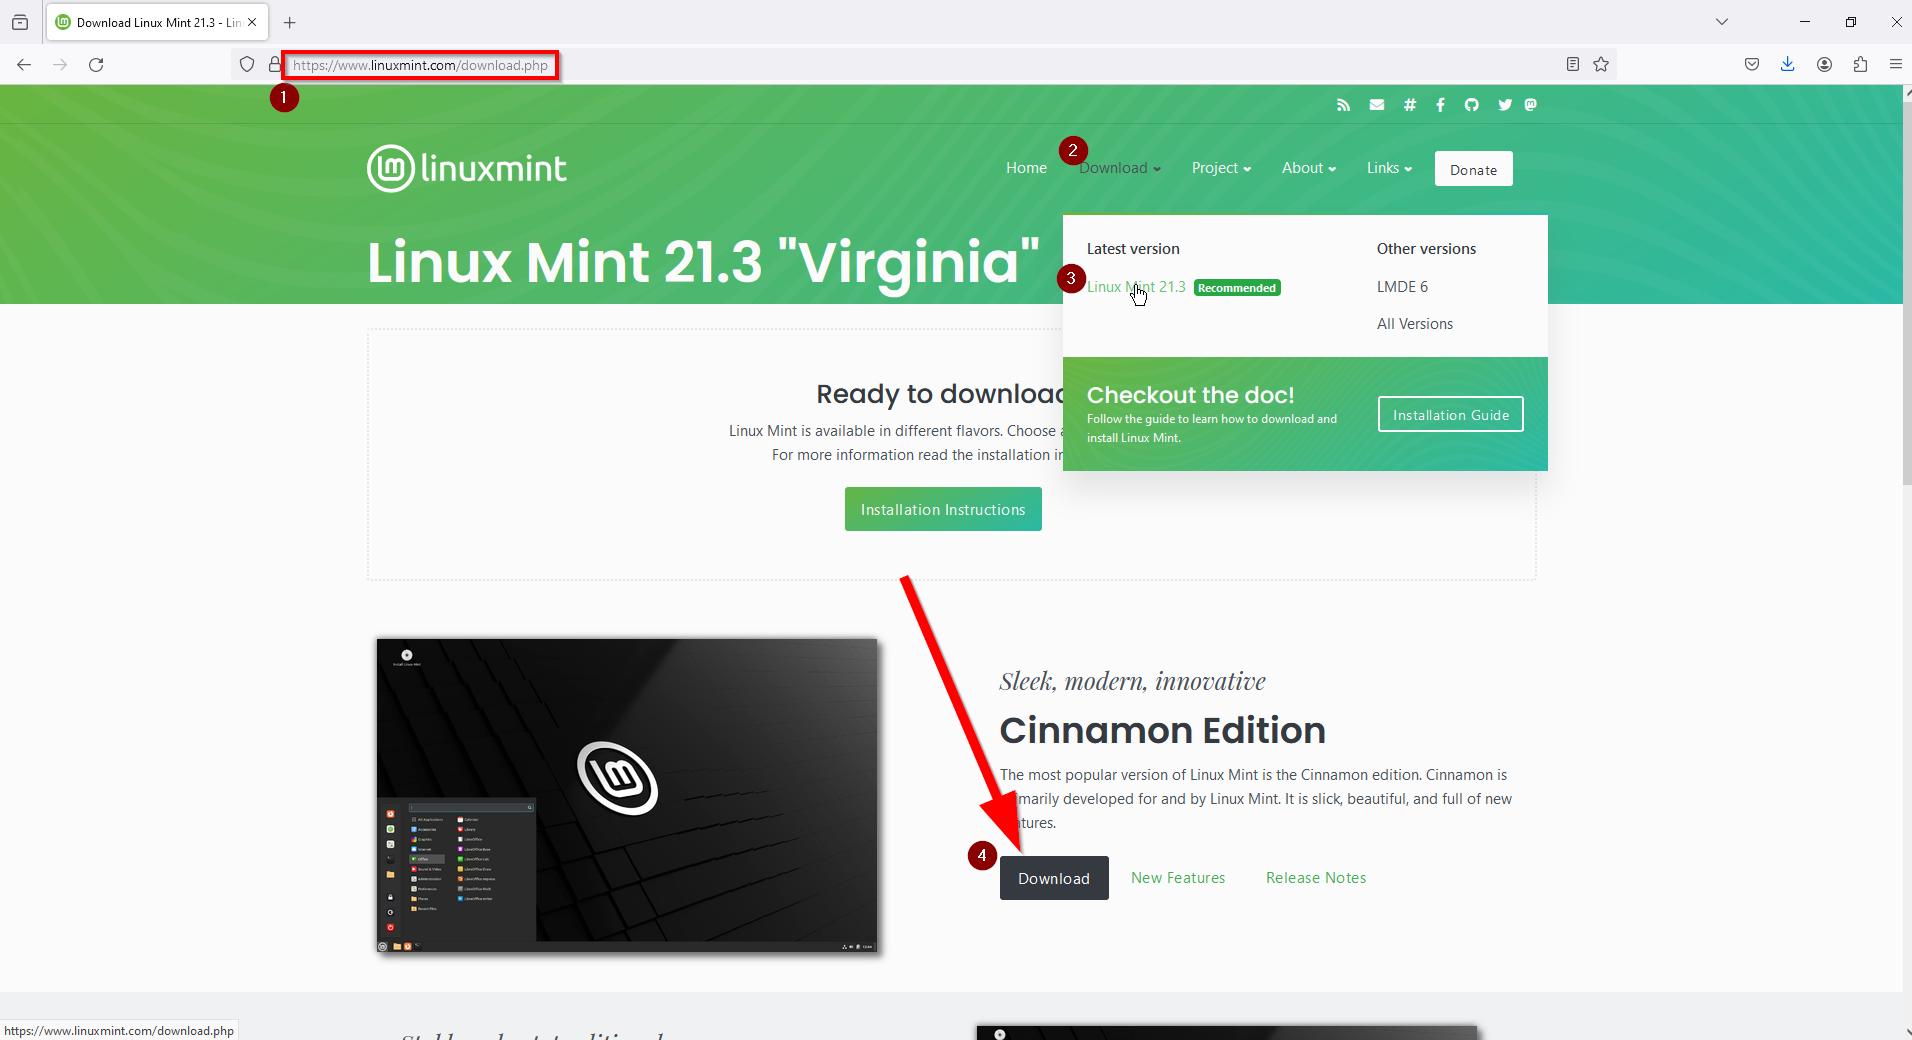
Now, navigate to the download page for the Linux distro you want to try and/or install. For this guide, we’ll use Linux Mint with the Cinnamon desktop, which can be downloaded here . (If you don’t know which distro or version to pick, check out our guides on the best Linux distros .)
Once your downloads have finished, insert your USB drive. On your PC, go into your Downloads folder (or whichever location you downloaded the above files to) and fire up Balena Etcher. If you downloaded the Installer, follow the prompts to install the program. If you downloaded the Portable version, Balena Etcher should fire right up when opened.
Once Balena Etcher is up and running, you’ll be prompted to flash an image from a file, flash an image from a URL, or clone a drive. Select “Flash From File.”
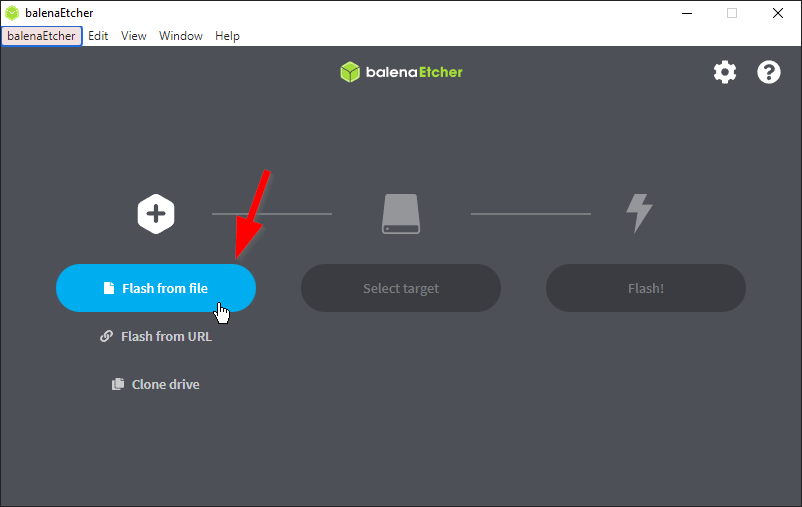
This will open a window prompting you to select the ISO image file for the Linux distro you just downloaded.
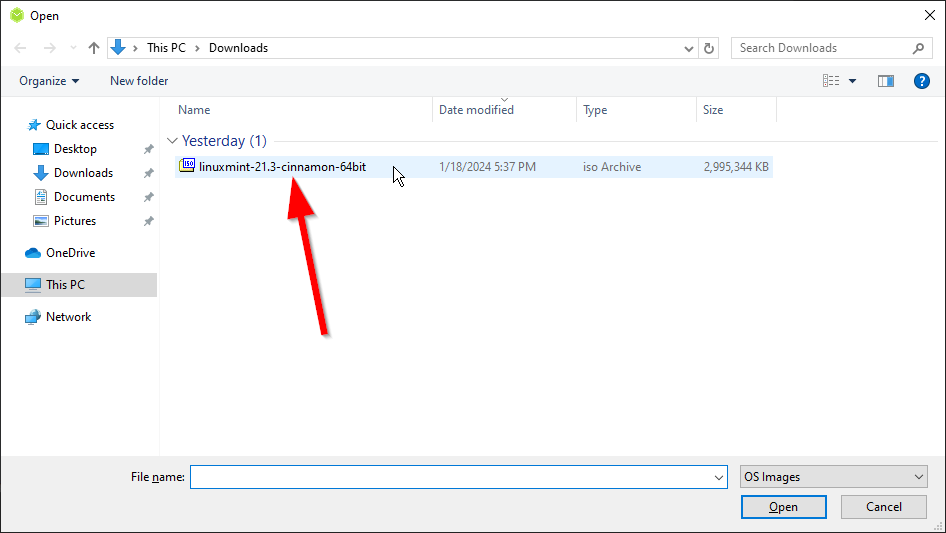
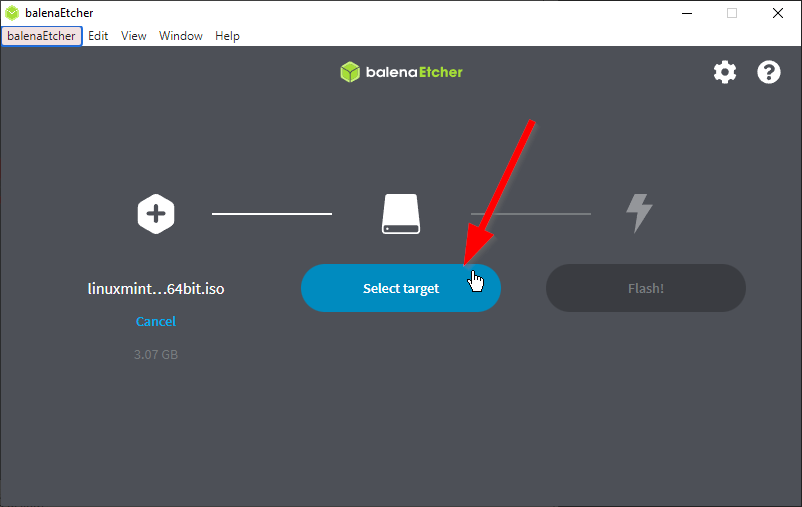
Once you’ve selected the file, double-click it or select “Open.” Balena Etcher will now prompt you to select a target drive. Be careful here as whichever drive you write the ISO image to will be completely wiped, meaning you could lose important data!
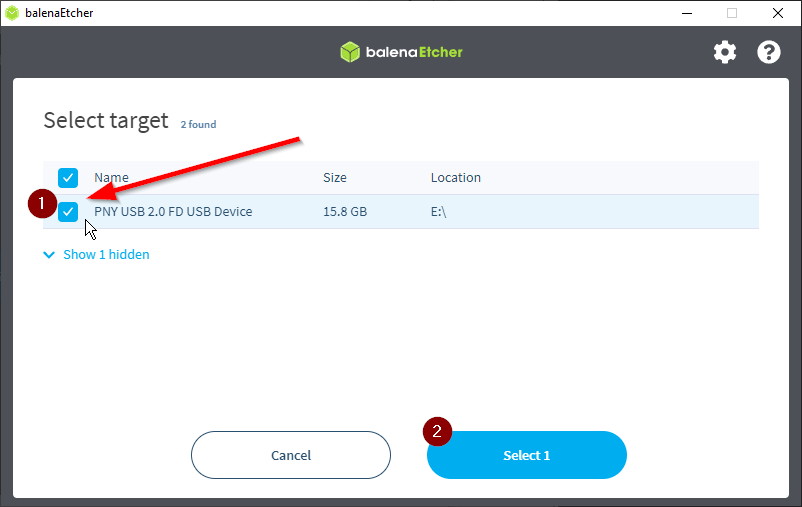
By default, Balena Etcher hides large drives or drives it detects as “system drives,” meaning an OS is already installed to it. Look at the “Size” and “Location” columns and make sure those match your USB drive. In this guide, we’ll be using a 16 GB USB drive, which shows up as a 15.8 GB drive located at E:\. Once you’ve double-checked that you selected the USB drive, click Select.
Now click “Flash!” and Balena Etcher will begin writing the ISO image to the USB drive and make it bootable
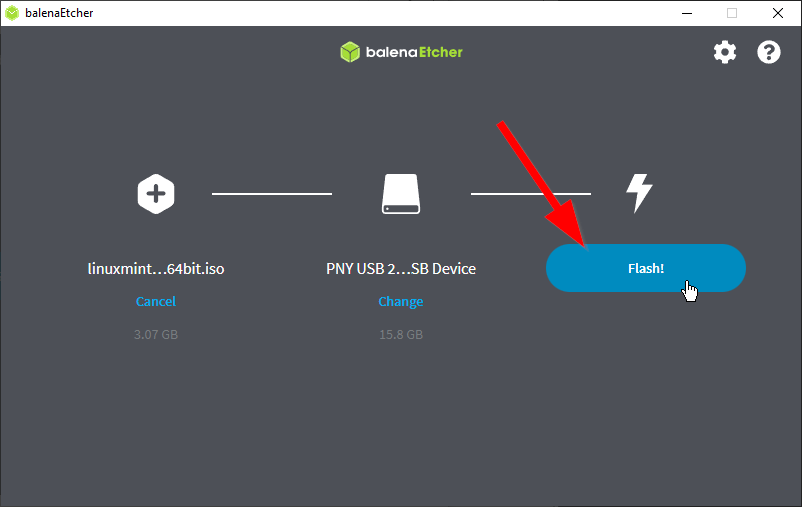
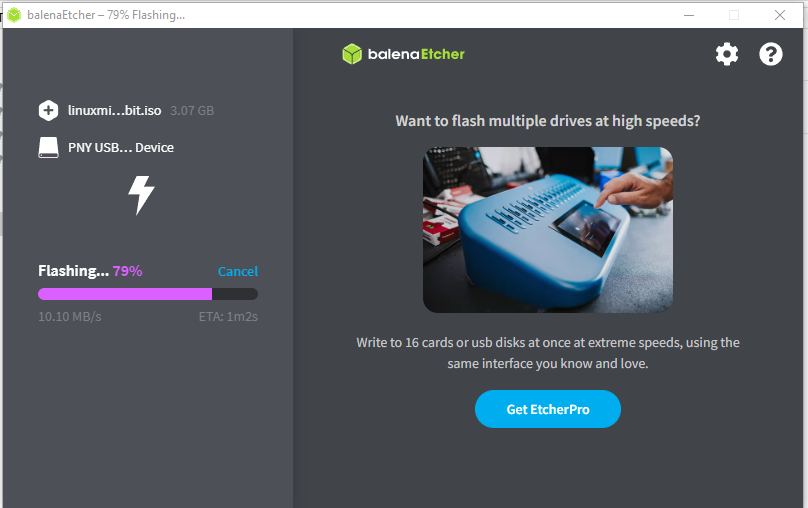
The process will take a few minutes, depending on the size of the ISO image. Once it finishes writing the ISO image to the drive, Balena Etcher will verify the image file.
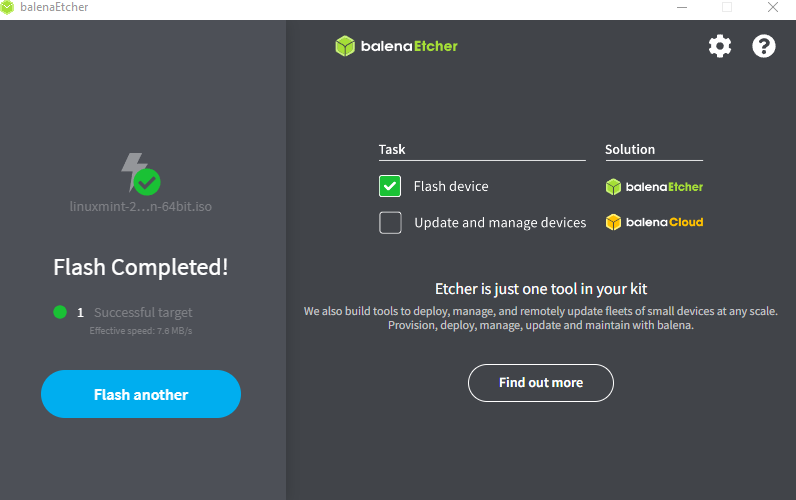
Once the ISO image has been written and verified, Balena Etcher will tell you the flash was successful and will prompt you to flash another drive. If you want to make another bootable USB drive, you can unplug the first drive, plug in the new USB flash drive, and click “Flash Another” to repeat the process. Otherwise, you can close Balena Etcher and eject the USB drive to remove it from your computer.
Congratulations! You’ve made a bootable Linux USB drive! From here, you can insert the USB drive into a computer and boot into Linux to try it out. If you want to commit to Linux, learn how to install the OS here .
Also read:
- [New] Essential Voice Capturing Apps for iPads #3 Top Picks for 2024
- [Updated] Essential Action Cam Recommendations for Winter Sports for 2024
- [Updated] In 2024, Addressing Inaudible Audio Steps for OBS Broadcasting
- Amazon Teams Up with Snapchat to Offer Innovative AR Shopping Experience for Glasses & Sunglasses – Insights by ZDNET
- Comment Réparer La Fenêtre De Commande Qui Ouvre Et Ferme Automatiquement Sur Windows 11: Solutions Facilement Appliquées
- How This Innovative Marketing Strategy Transformed Mother’s Day Sales for the Better | ZDNet
- In 2024, 'Frolic Fables' - A VHS Review of The Comical Epic
- In 2024, How to Mirror Motorola Moto G84 5G to Mac? | Dr.fone
- Instant Techniques to Shuffle YouTube Song Sequences for 2024
- Is Your Data Secure on Temu? Unpacking Concerns with Its Minimal Security Layers | Online Shopping Insights
- Rev Up Your Retail Game on Prime Day: Exploring the Latest Additions to Google's Shopping Arsenal | Tips & Tricks for Success
- Set Your Preferred Job Location on LinkedIn App of your Xiaomi Redmi Note 12 Pro+ 5G | Dr.fone
- Steam Error Code 130 Solved! Learn How to Correctly Troubleshoot This Problem
- The Ultimate How-To for Apple Pay Users: Navigating Purchases on the Go and Online, According to ZDNet Experts
- The Ultimate Tech Deals Companion: Your 2021 Guide to Maximizing Savings on Black Friday & Cyber Monday - ZDNet
- Troublesome Competition: How Southwest, United & American Airlines Face Off Against The Web's Least Attractive Website
- Universal Prohibition: Meta Implements Strict Rules Against the Use of AI for Global Political Campaigns - Insights From ZDNet
- Title: Creating a Bootable Ubuntu Stick with Etcher on Any PC
- Author: John
- Created at : 2024-12-20 01:57:24
- Updated at : 2024-12-25 20:40:34
- Link: https://techno-recovery.techidaily.com/creating-a-bootable-ubuntu-stick-with-etcher-on-any-pc/
- License: This work is licensed under CC BY-NC-SA 4.0.