Elevating Your Workflow: How I Enhanced the Visual Appeal of Windows Terminal
Elevating Your Workflow: How I Enhanced the Visual Appeal of Windows Terminal
Quick Links
- Built-in Customization Options Are a Great Start
- Using Oh My Posh to Beautify the Windows Terminal
- A Beautiful Windows Terminal at Your Service
Don’t like the good old “white text on black screen” look of the Windows Terminal? Me neither. Gladly, you don’t have to stick with it. Here’s how you can change several items related to the Terminal, and how to completely change the look and feel of it.
Built-in Customization Options Are a Great Start
The Windows Terminal contains many built-in settings you can tweak to perform an instant appearance upgrade. Make sure you have the Windows Terminal app installed from the Microsoft Store .
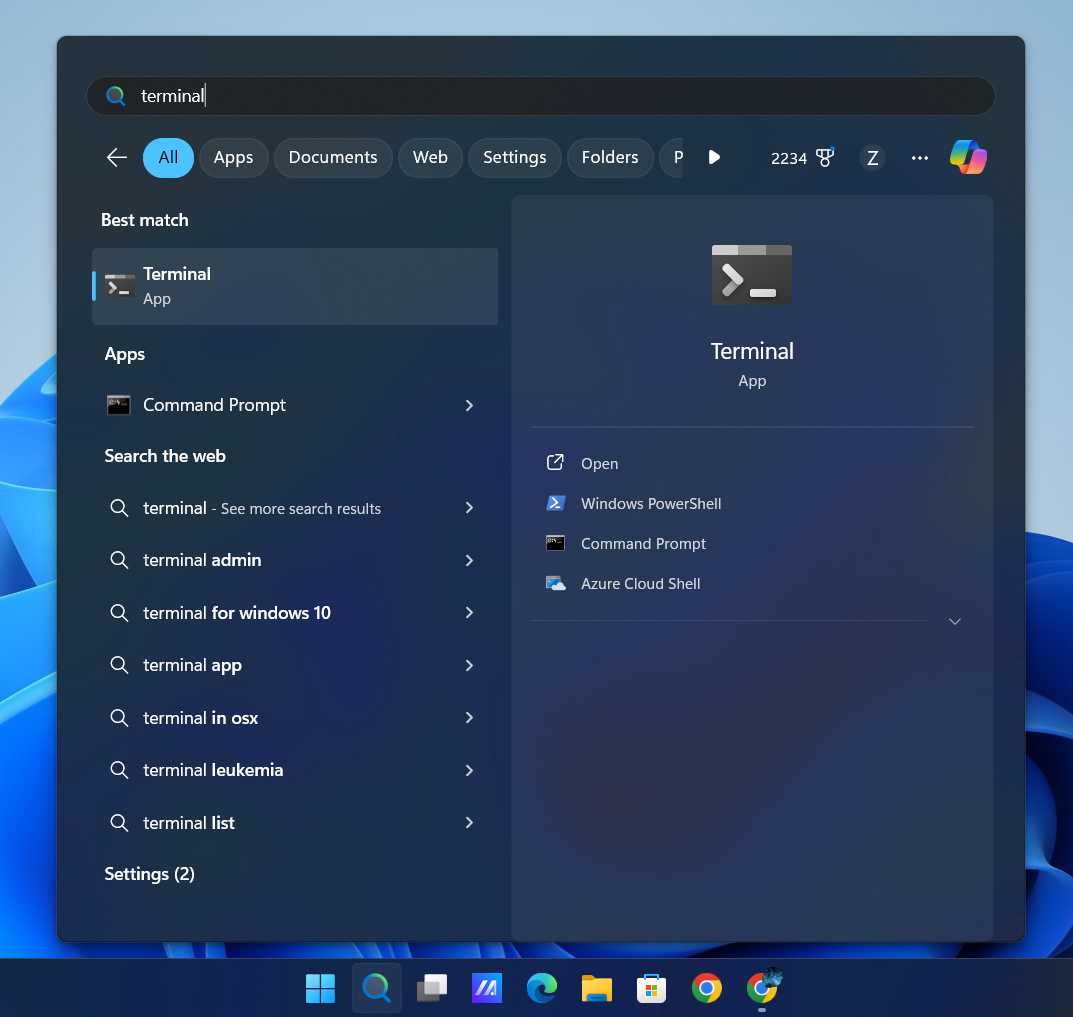
Go to Search in the Taskbar and enter Terminal, then open the top result.
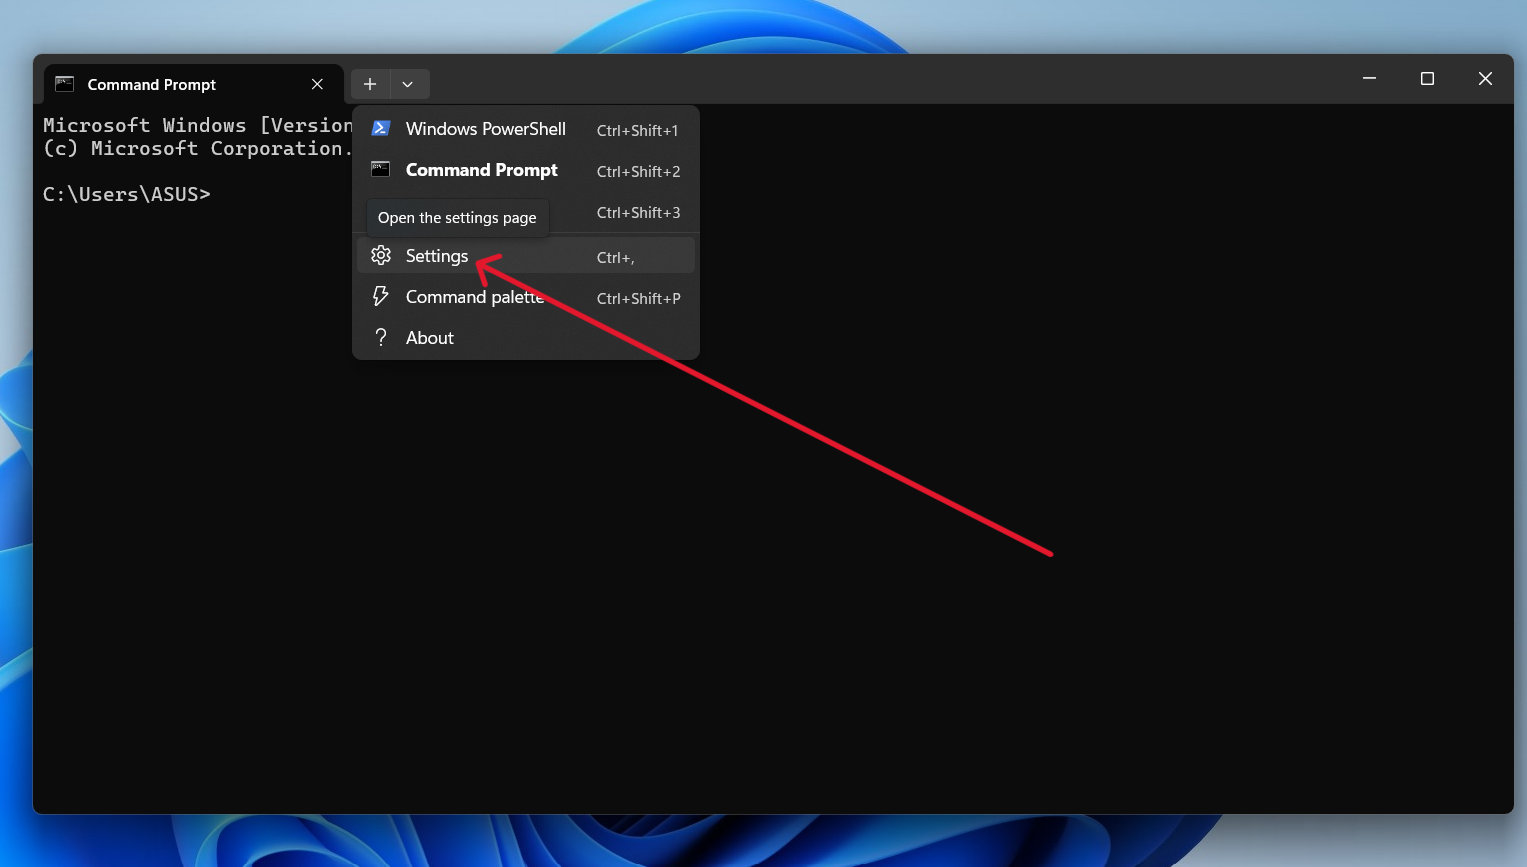
On the title bar, press the drop-down button and go to “Settings.”
From here on, we’ll tweak different settings to change the look and feel of the Windows Terminal.
Title bar
Let’s start with the title bar. Right now, it has a solid black color, but you can make it transparent. Go to “Appearance,” turn on “Use acrylic material in the tab row,” then click “Save” to commit your changes.
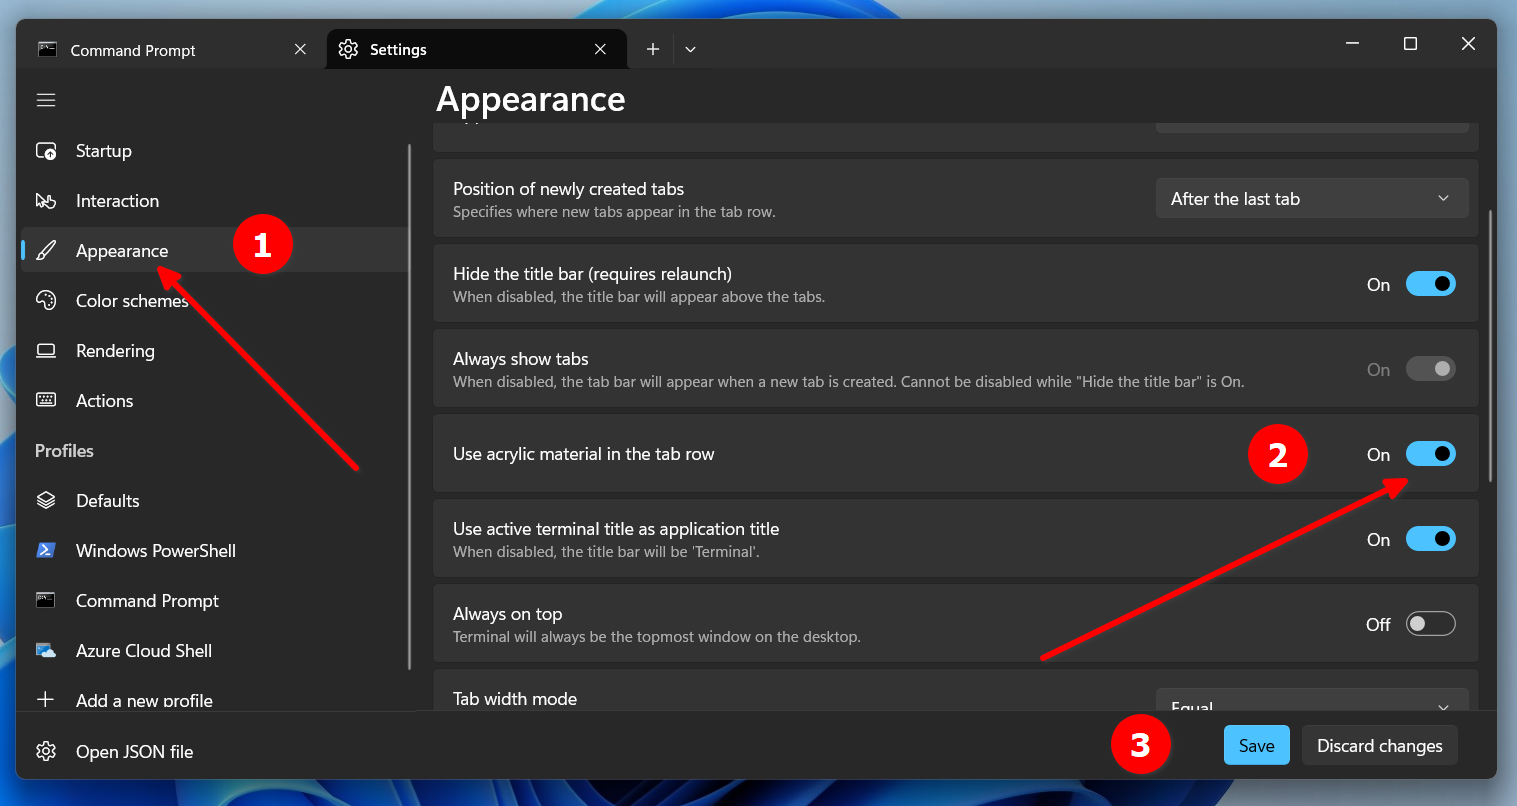
The title bar should become transparent with a blurry effect. You’ll see whatever is behind the Terminal window but behind a blurred glass.
Changing Themes
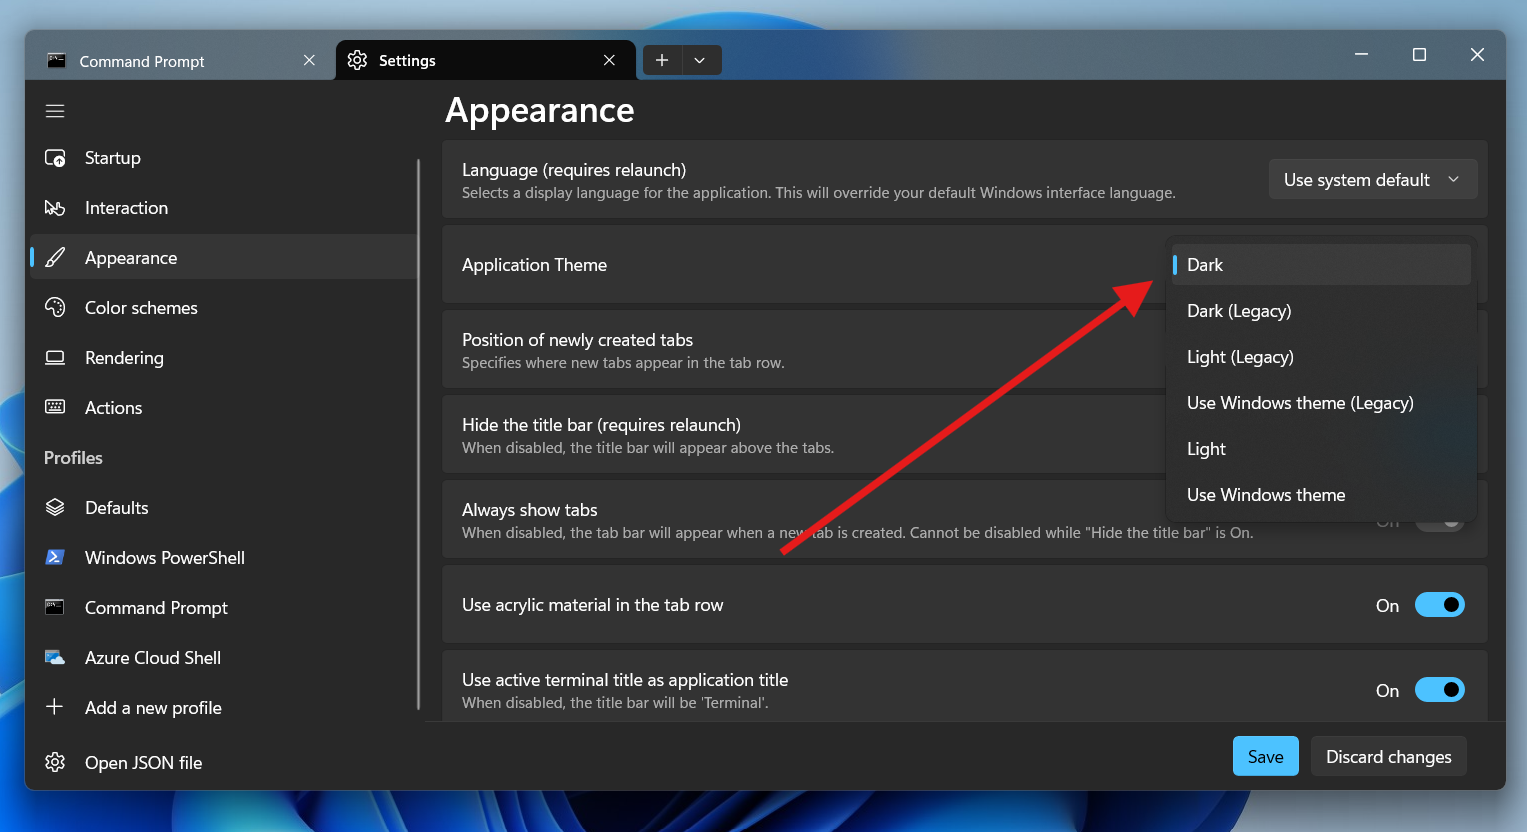
In the “Appearance” menu, you can choose Light and Dark themes from the “Application Theme” drop-down menu.
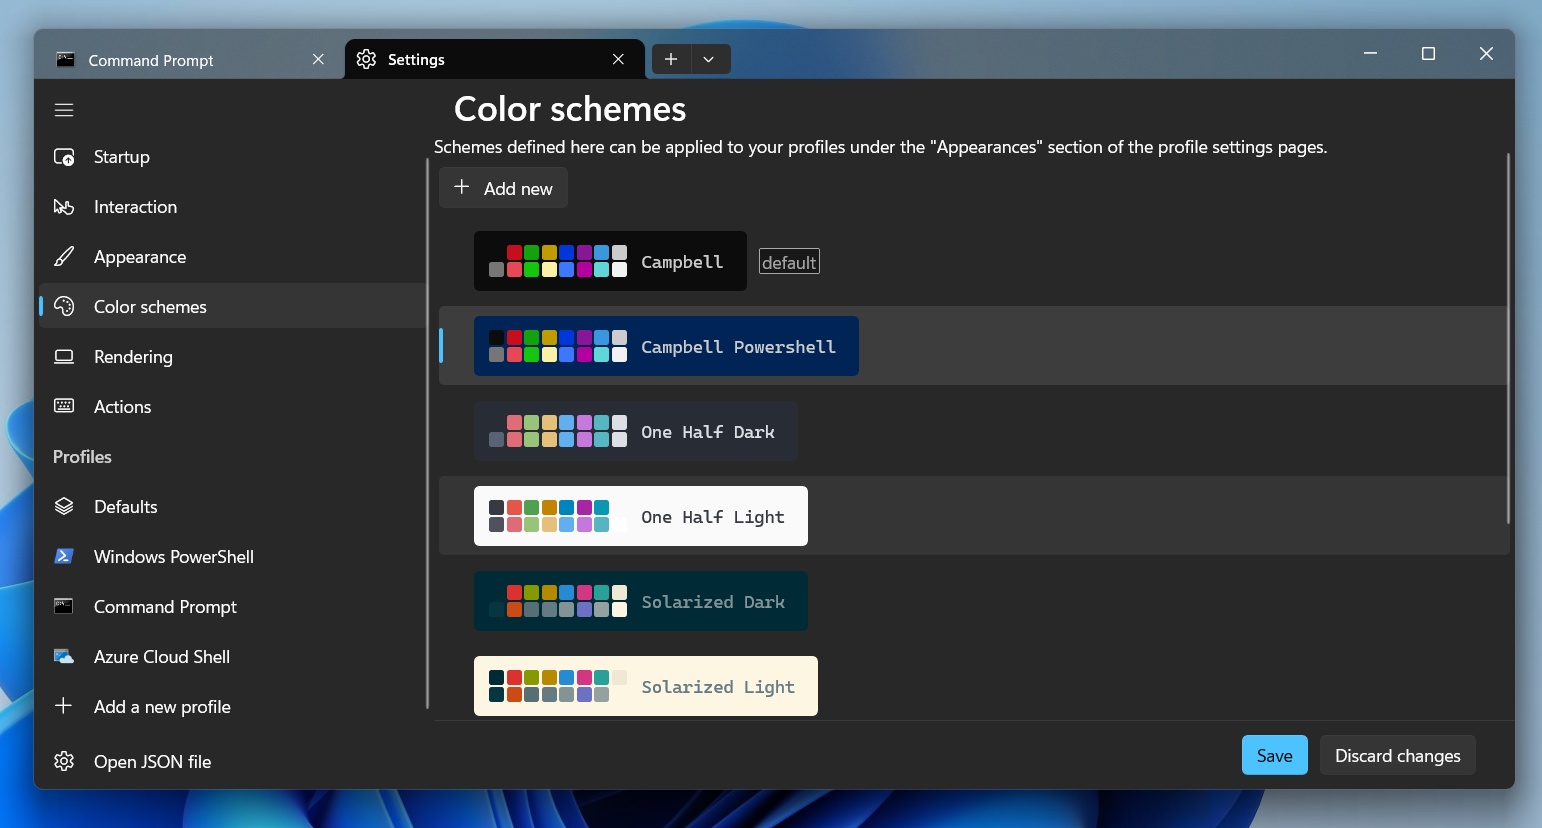
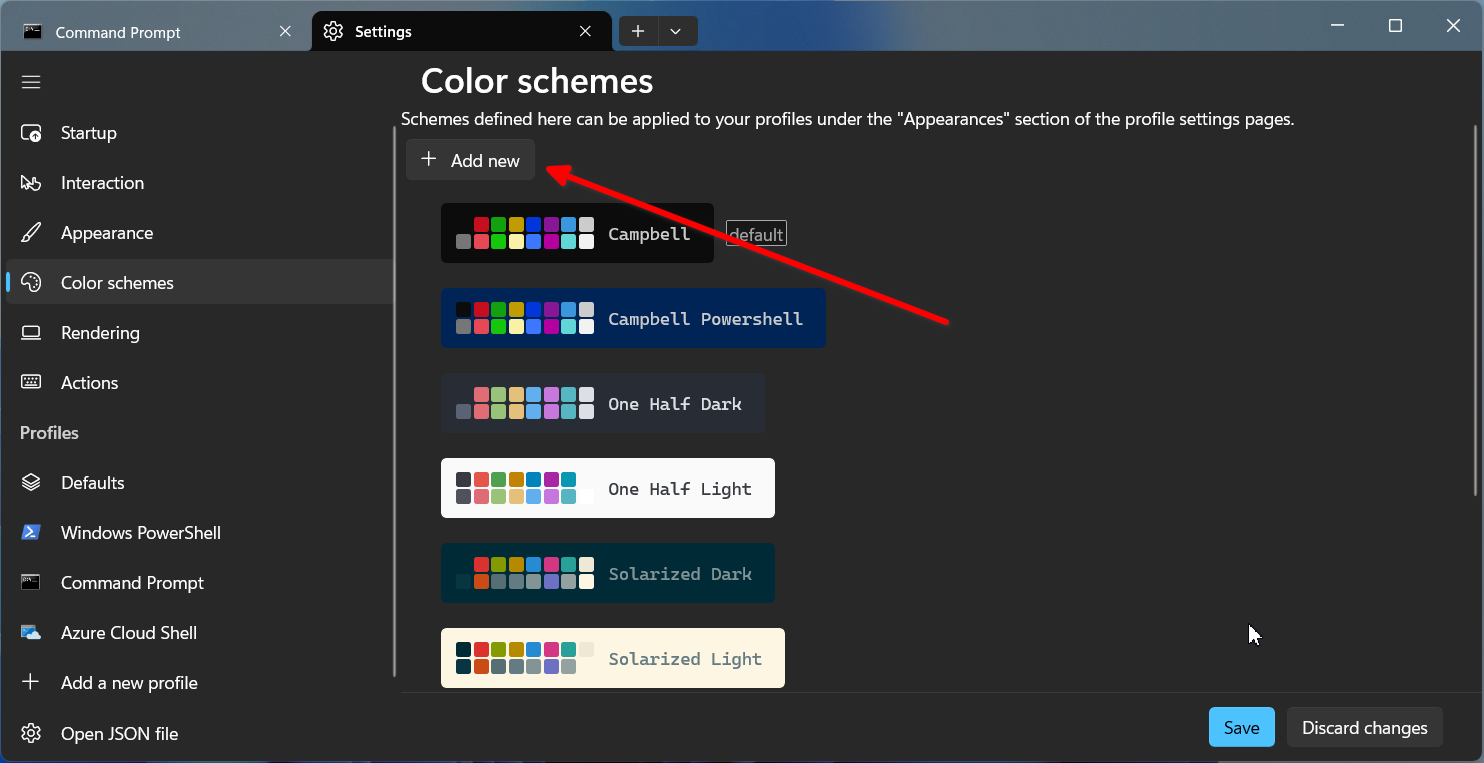
The “Color Schemes” menu contains many more themes, or you can even create your own color scheme.
When adding a new color scheme, you have two options.
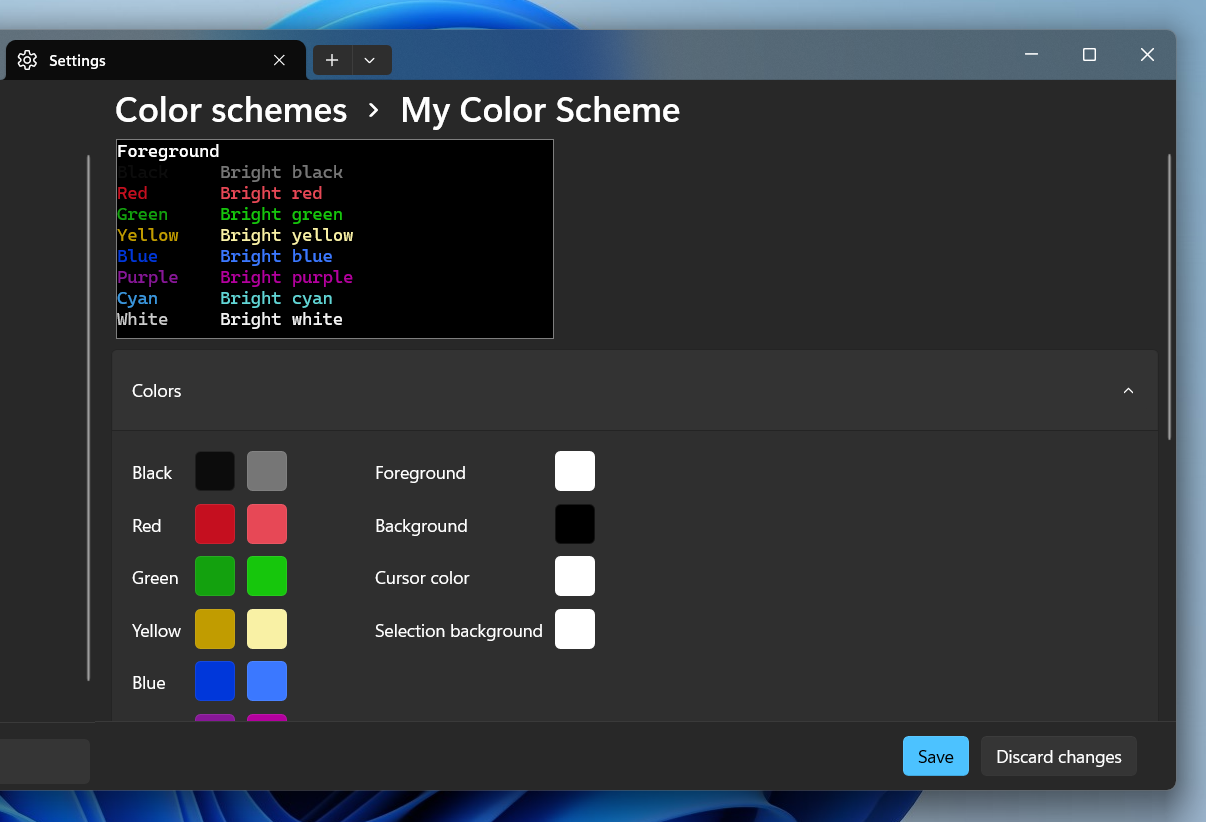
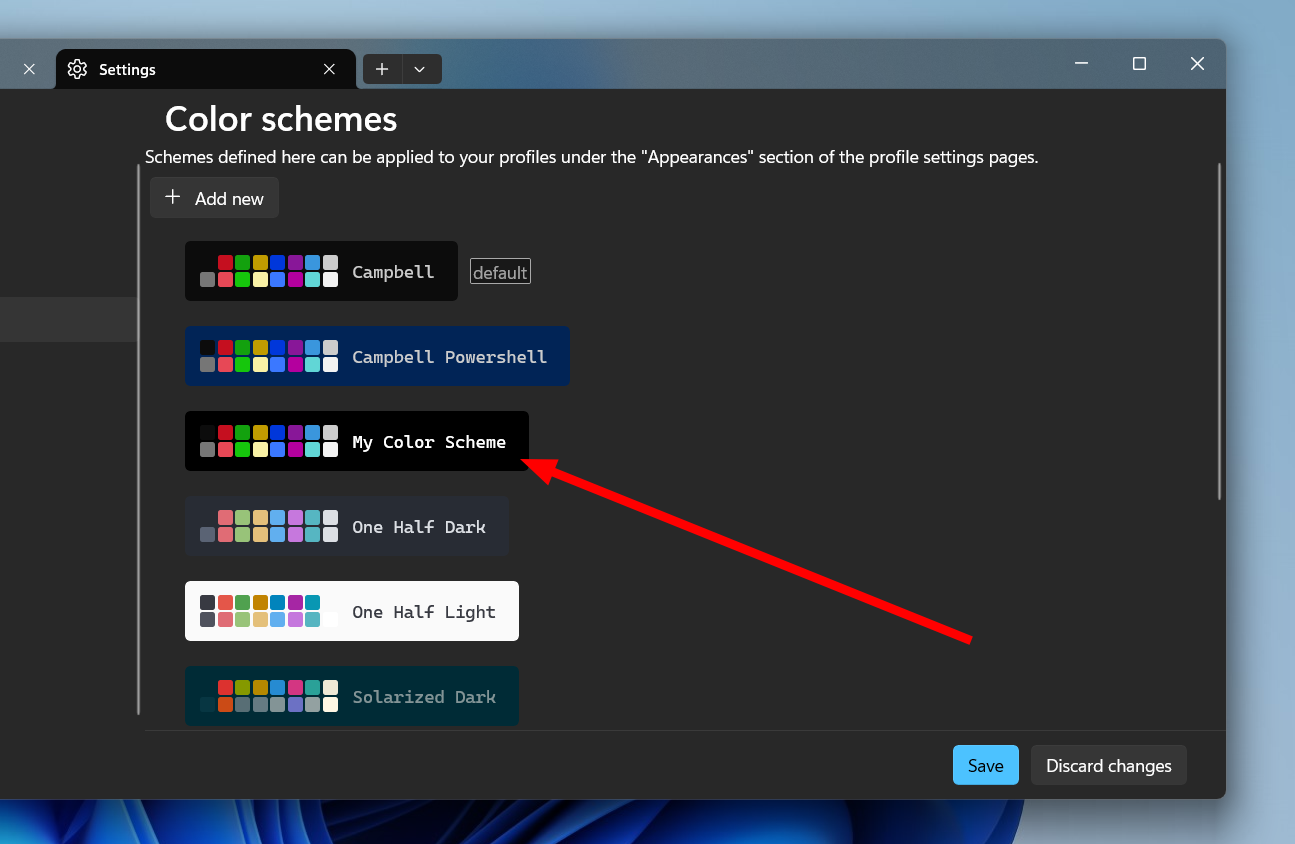
You can press the “Add New” button, play around with the color selection, and press the “Save” button to save it as a new color scheme. Then, you can choose that scheme from the list of color schemes. You need to set it as default to start using it.
Close
The other option is to use JSON code to define the color scheme and add it to the Terminal’s JSON file.
First, you’ll need to create the JSON code for your color scheme. However, you can find many done-for-you themes on the internet. Many websites—such as Windows Terminal Themes and TerminalSplash —offer JSON code for different themes. Search and pick one that suits your taste. For demonstration, I’m choosing this Solarized Dark Patched theme from TerminalSplash.
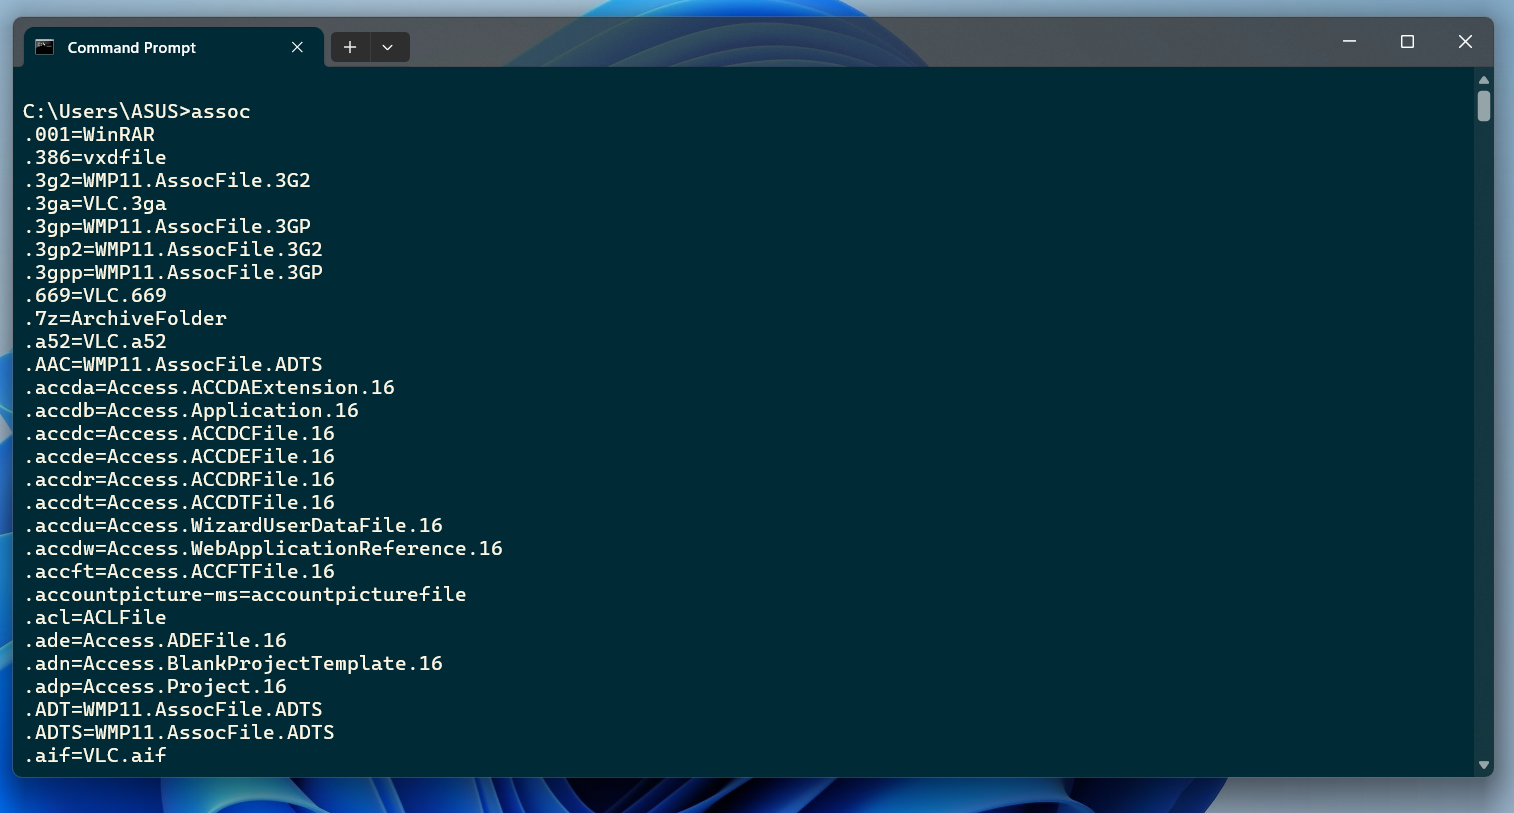
After copying the JSON code, open the JSON file of the Terminal.

It will open in your default text editor for JSON files, which is probably Notepad . After that, scroll down until you find the Schemes section. You can also use the search functionality to find it faster.
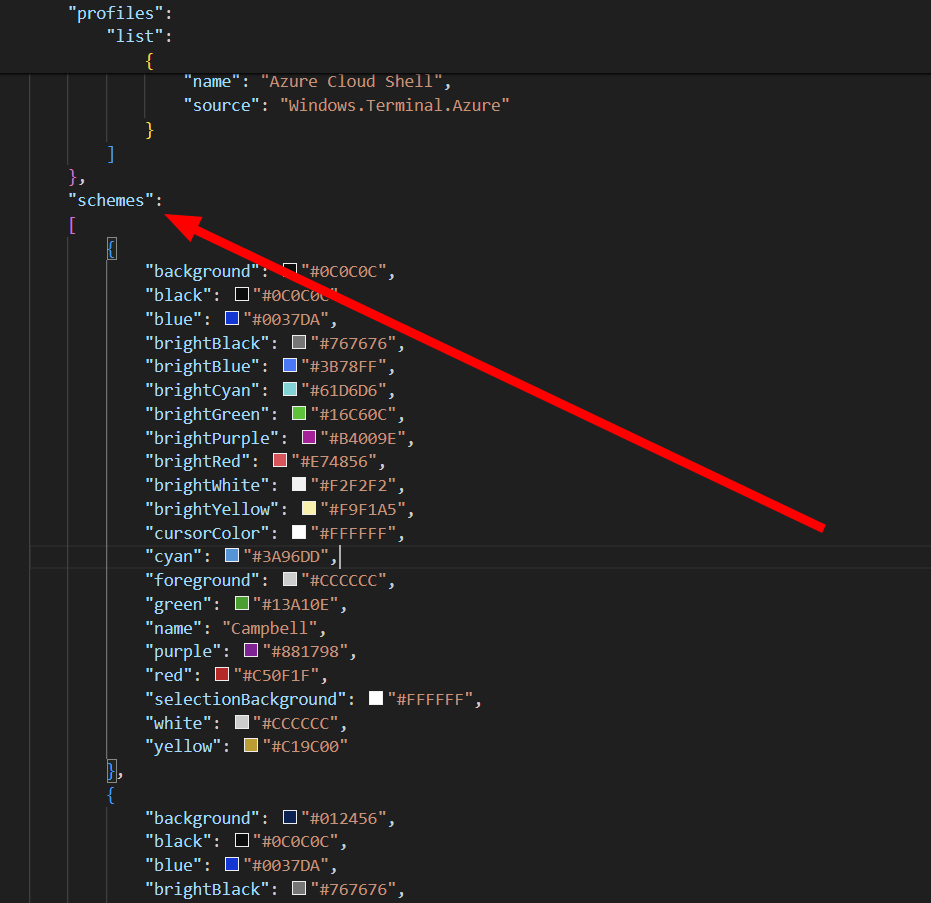
After finding the schemes section, scroll down a bit further until you reach the last scheme (each scheme is closed between curly braces and then comma separated.) Add a comma after the last scheme and then paste the JSON code of your color scheme.
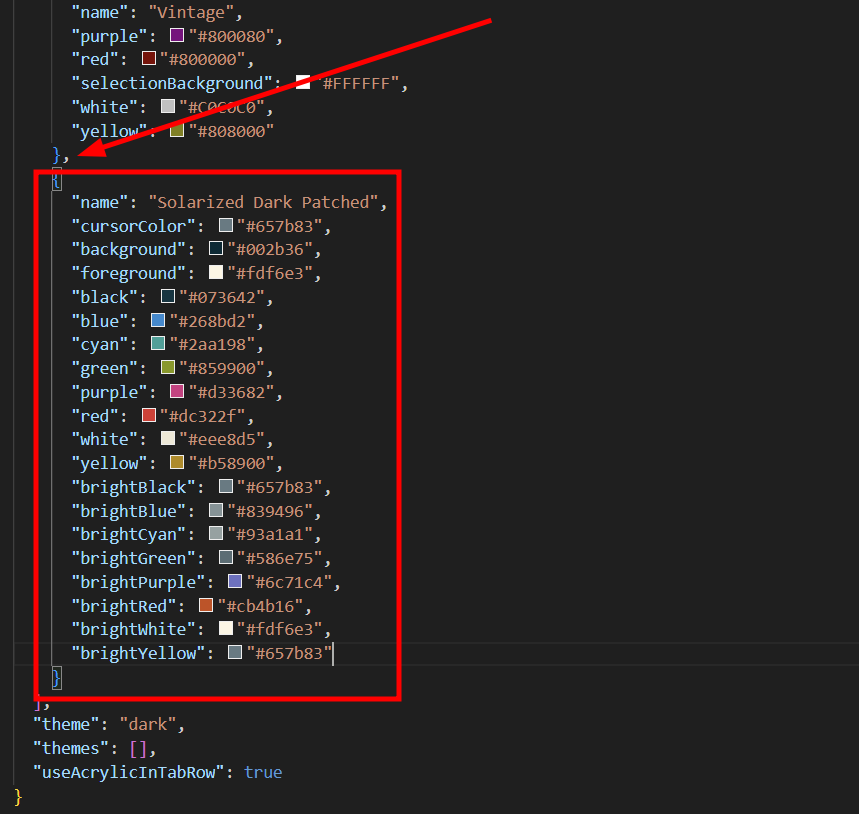
Save the file and exit the JSON file. Go back to the “Color Schemes” menu, and you should see the newly added theme in the list. Set it as default to use it. Press the “Save” button to save your changes. To see the new theme in action, restart the Windows Terminal.
Fonts
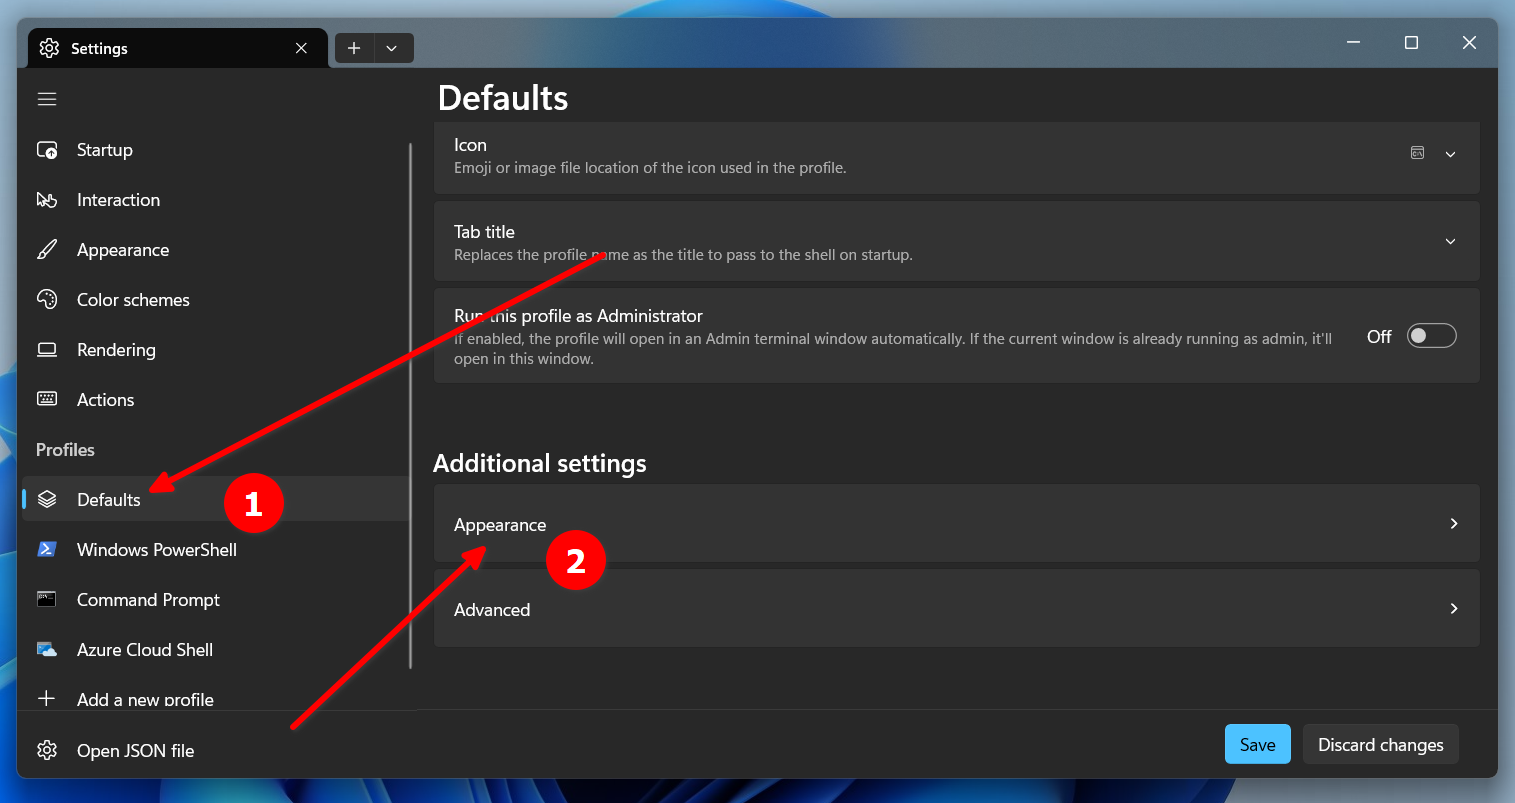
To change the fonts you use in the Terminal, go to “Defaults” under Profiles. Then, under Additional Settings, go to “Appearance.”
You should see a few font-related options here. You can choose the font family, font size, and font weight.
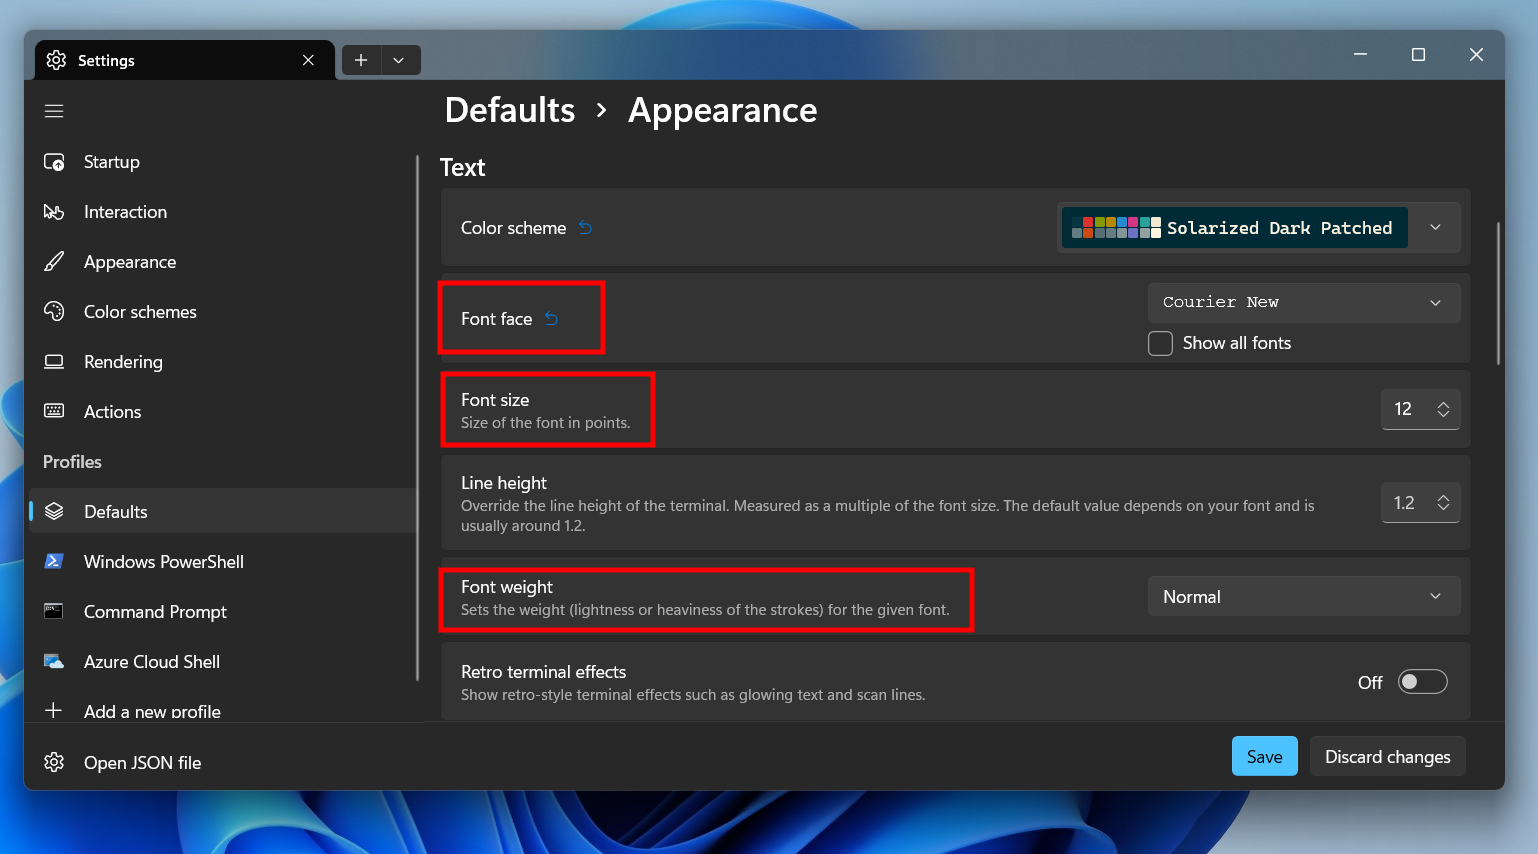
There are a few fonts to choose from. If you fancy, you can download additional fonts from Nerd Fonts , install them, and configure them so you can use them system-wide, including the Terminal.
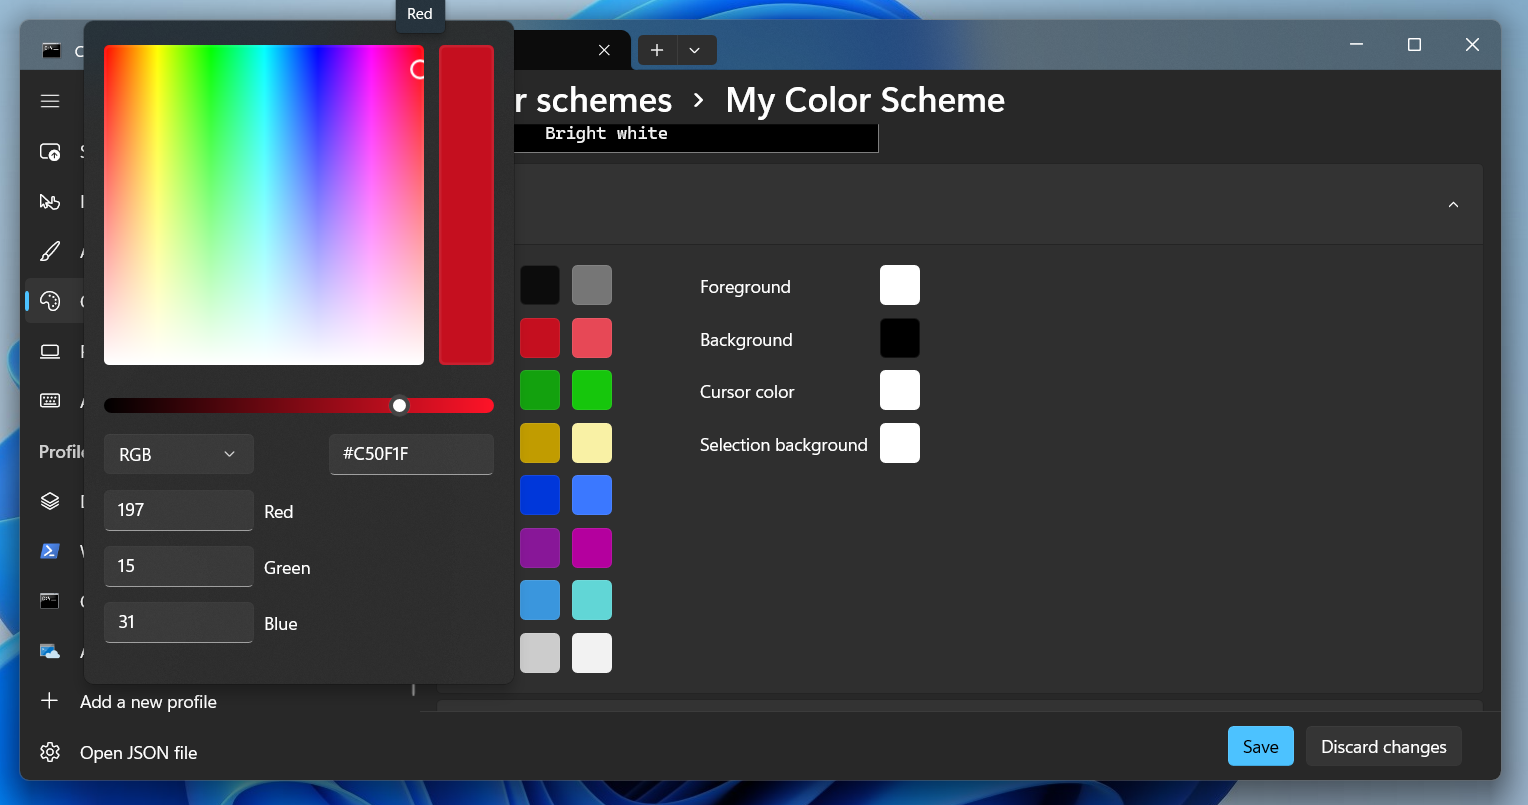
Color and Background
When you choose a theme, it automatically selects a set of colors. However, you can adjust the colors individually. The settings let you pick colors using RGB values, HSV values, color codes, and a graphical color picker. You can set a color for the foreground, background, cursor, and selection.
If you don’t like using solid colors for the Terminal background, you can also choose images. Go to Defaults > Appearance, then under Background Image, provide a path for the image you’d like to use as the background. You can also use your desktop wallpaper. Once you choose an image, you’ll notice more options, such as the image stretch mode, alignment, and opacity.
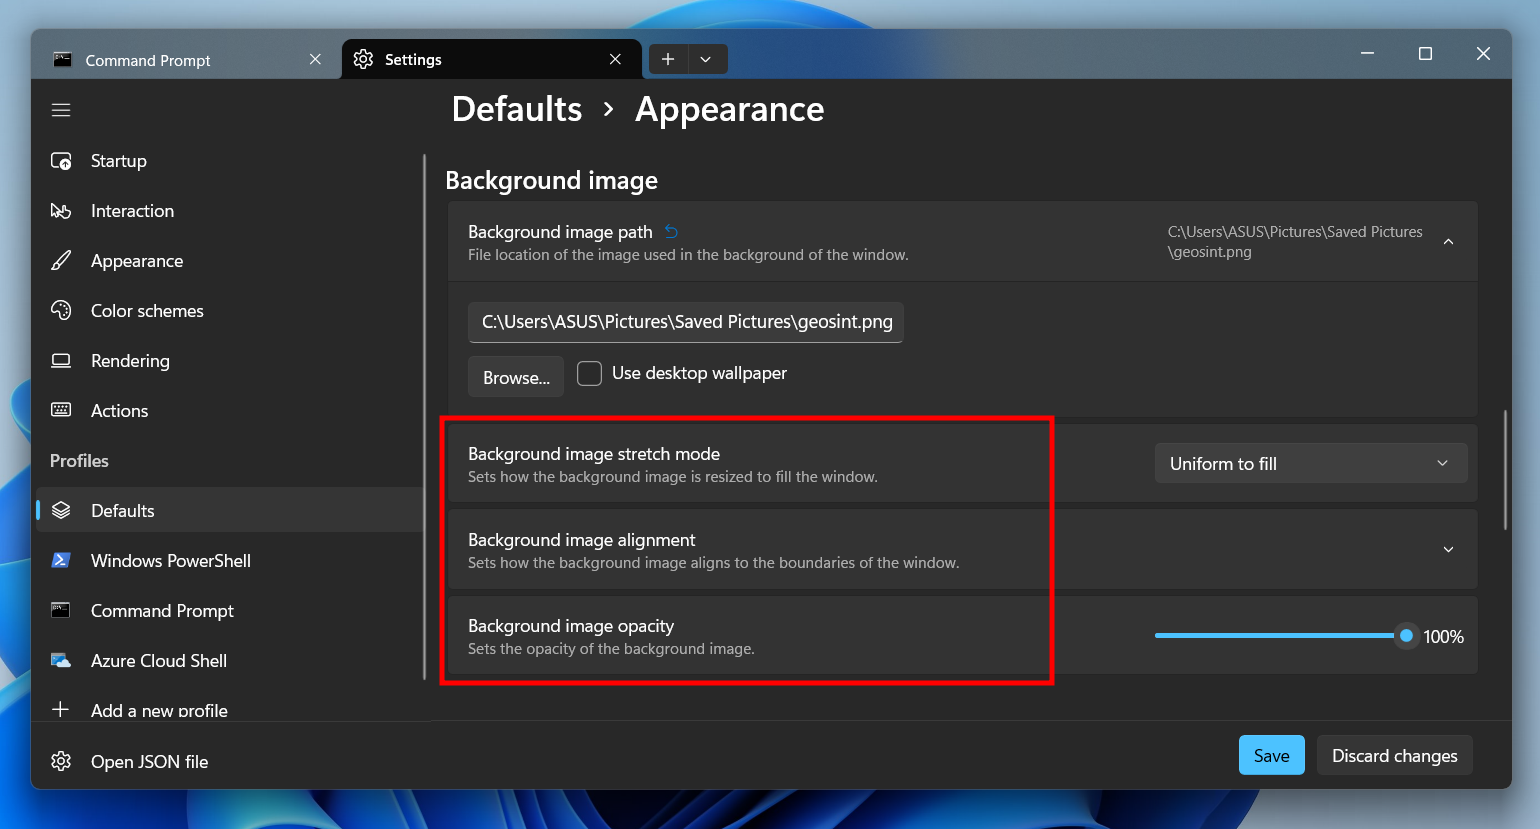
Make sure to choose a less bright image as your background. Otherwise, you’ll have a hard time seeing the text. Another option is to lower the opacity to about 50%.
Using Oh My Posh to Beautify the Windows Terminal
Oh My Posh is a custom prompt theme engine for shells, including CMD and PowerShell. It allows you to set colorful and meaningful themes on the Terminal prompt.
Installing and Setting Up Oh My Posh
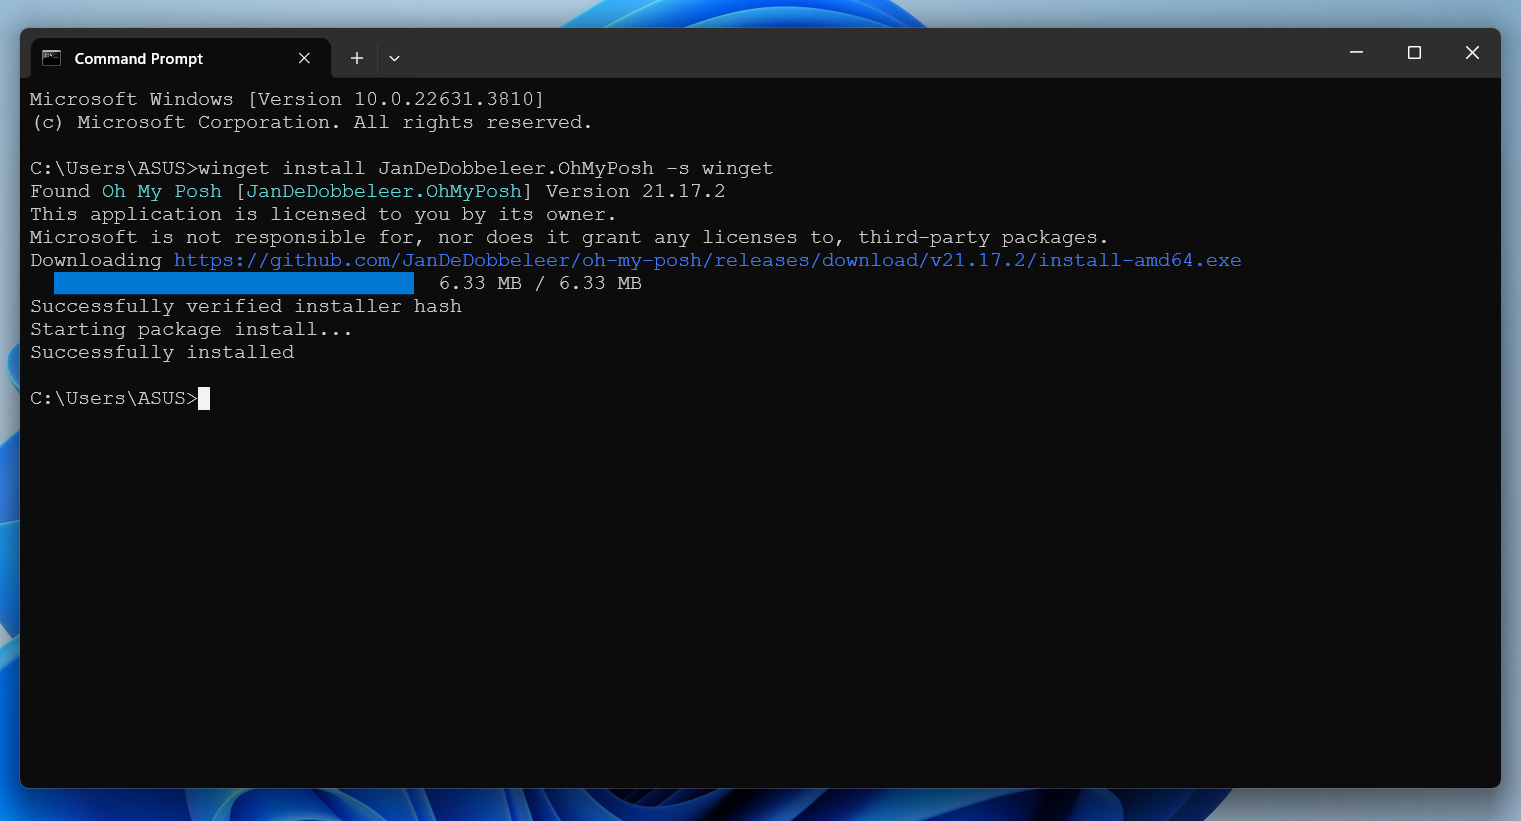
To install Oh My Posh, you’ll first need the winget package manager installed. After that, run this command in CMD to install Oh My Posh:
winget install JanDeDobbeleer.OhMyPosh -s winget
After the installation, restart the Terminal to reload the PATH . To confirm the installation, run:
oh-my-posh
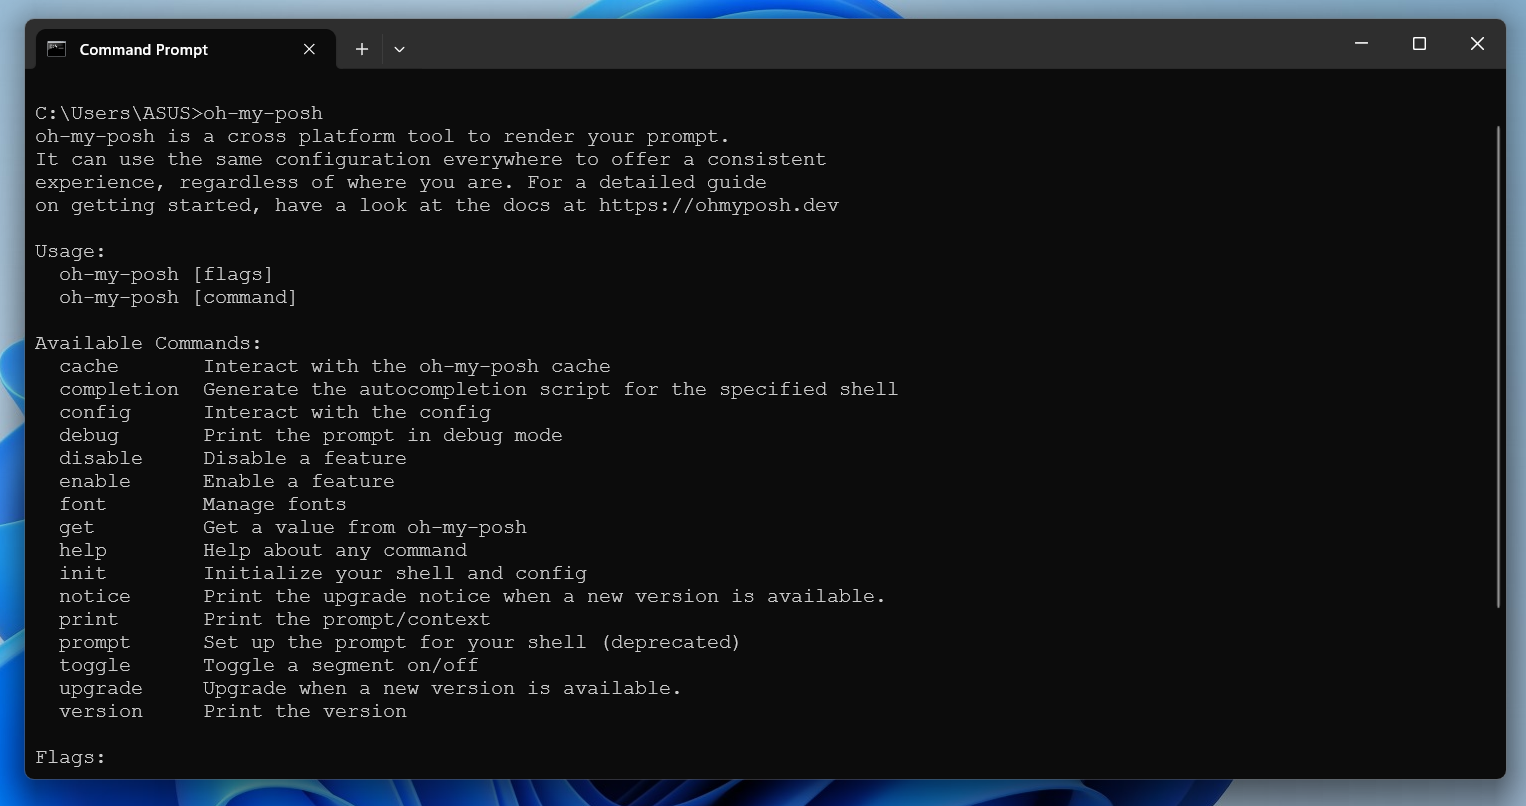
Great! It’s been installed successfully. Now we can customize our Terminal using this tool.
Customizing the Terminal
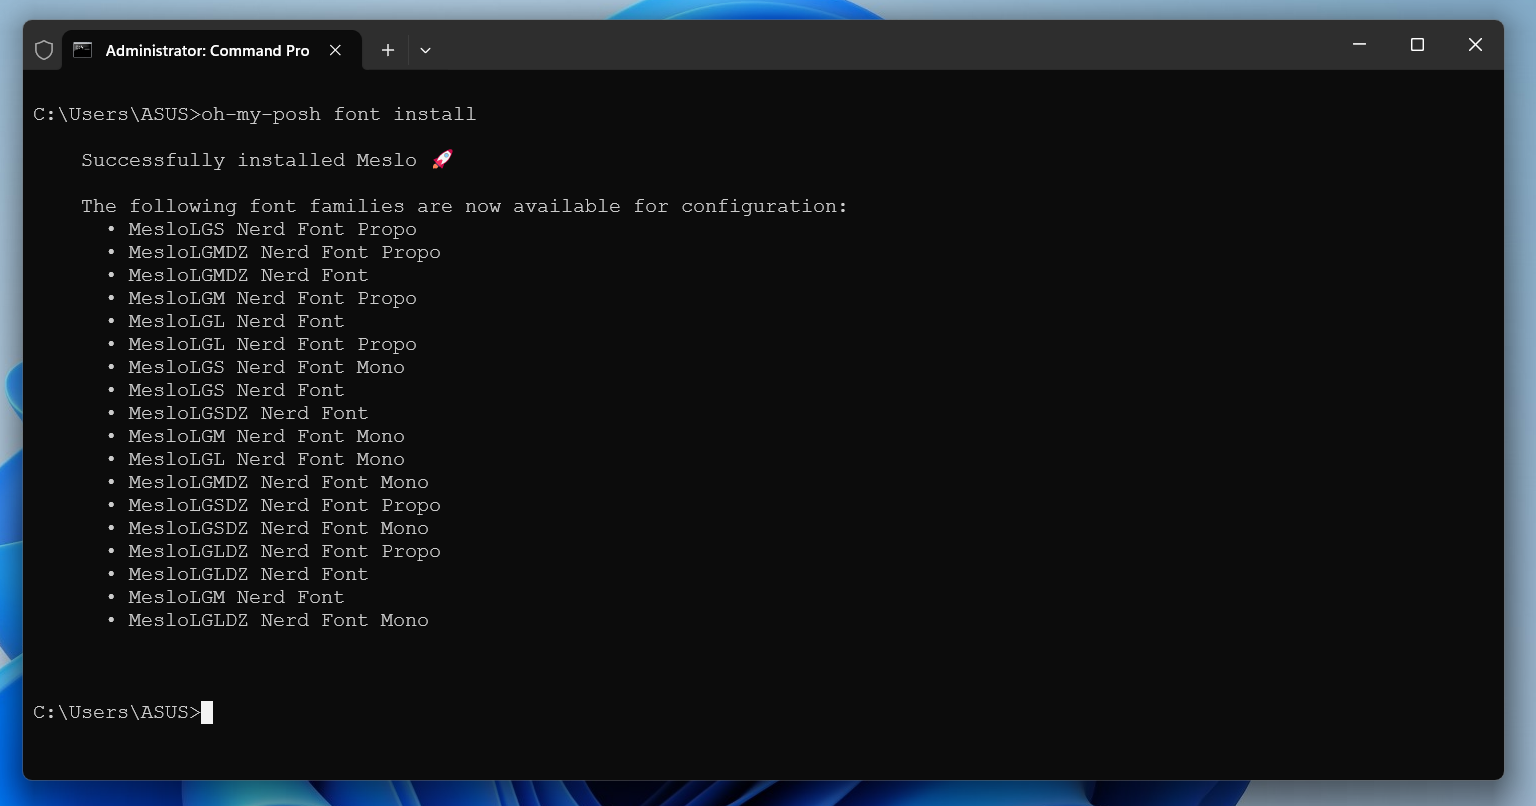
To make the most out of Oh My Posh, you should install a Nerd Font. That’s because Oh My Posh uses many icons and glyphs not supported by the default installed fonts on your system. If you didn’t install a font in the previous step, you can do so now using Oh My Posh. Open the Terminal as an administrator. Then view the available fonts by running this command:
oh-my-posh font install
You can scroll and choose a font to install it. I’m going to install “Meslo.”
Alternatively, you can install the font by adding its name to the previous command, like this:
oh-my-posh font install meslo
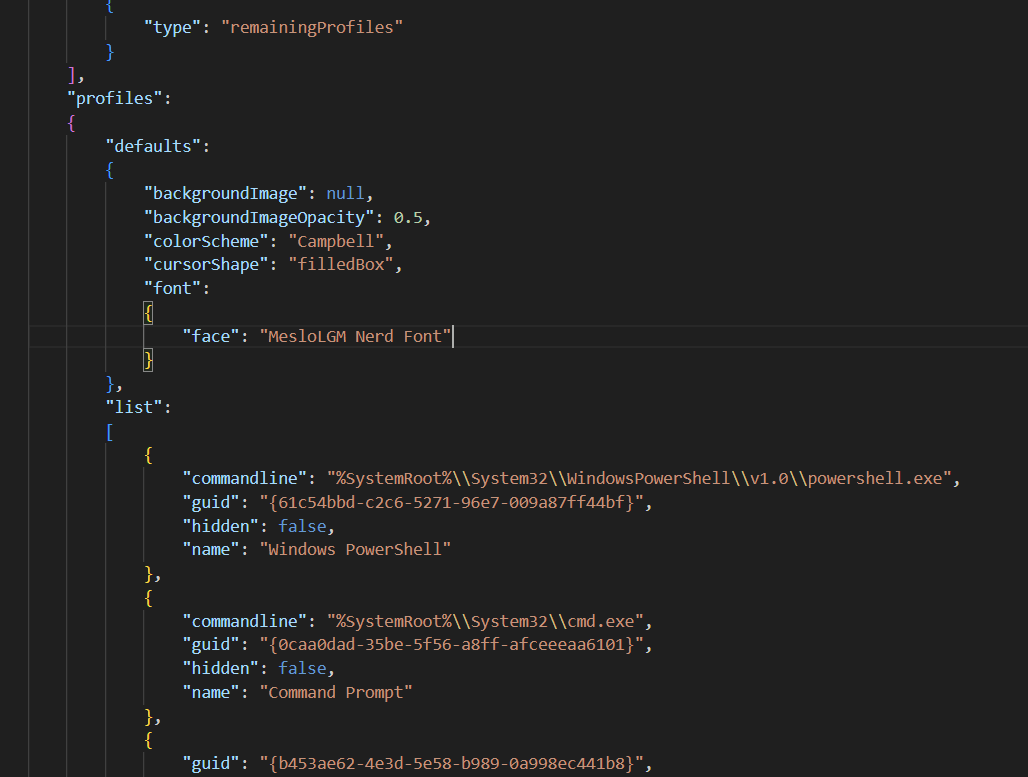
After that, set it as default in the settings.json file by adding the font name in the font face section under profiles. Save the file.
Now let’s try an Oh My Posh theme. Open PowerShell and run:
oh-my-posh init pwsh –config “$env:POSH_THEMES_PATH\jandedobbeleer.omp.json” | Invoke-Expression
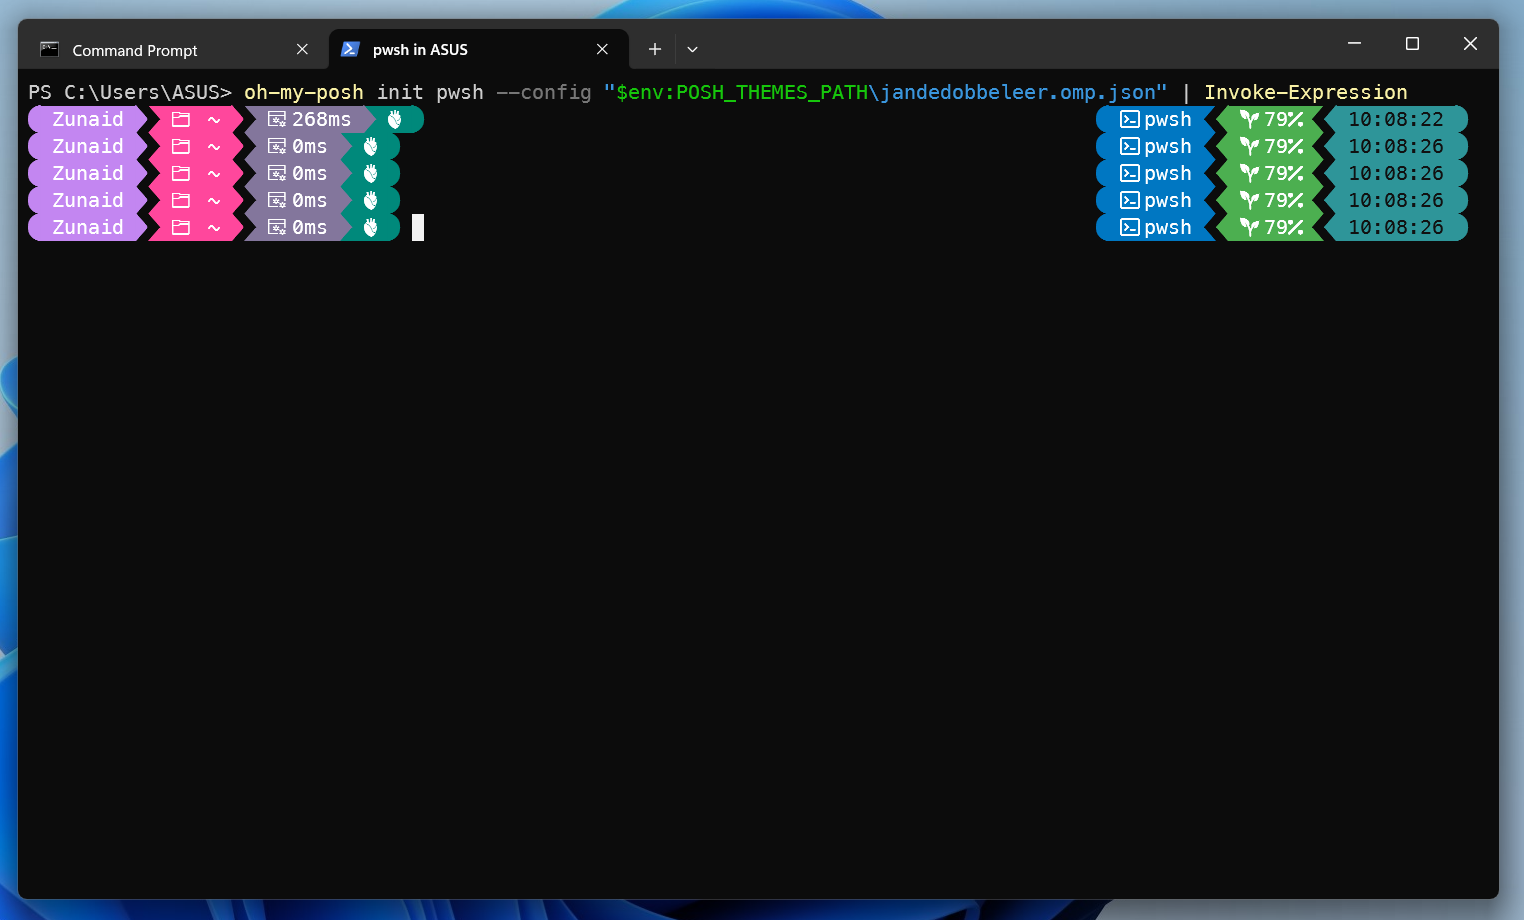
That already looks better than what we had.
If you’re having rendering problems, or seeing unsupported characters in your theme, in the Terminal, go to Settings > Rendering. Turn on “Use the new text renderer (“AtlasEngine”).” Also, make sure you’ve installed a compatible Nerd Font.
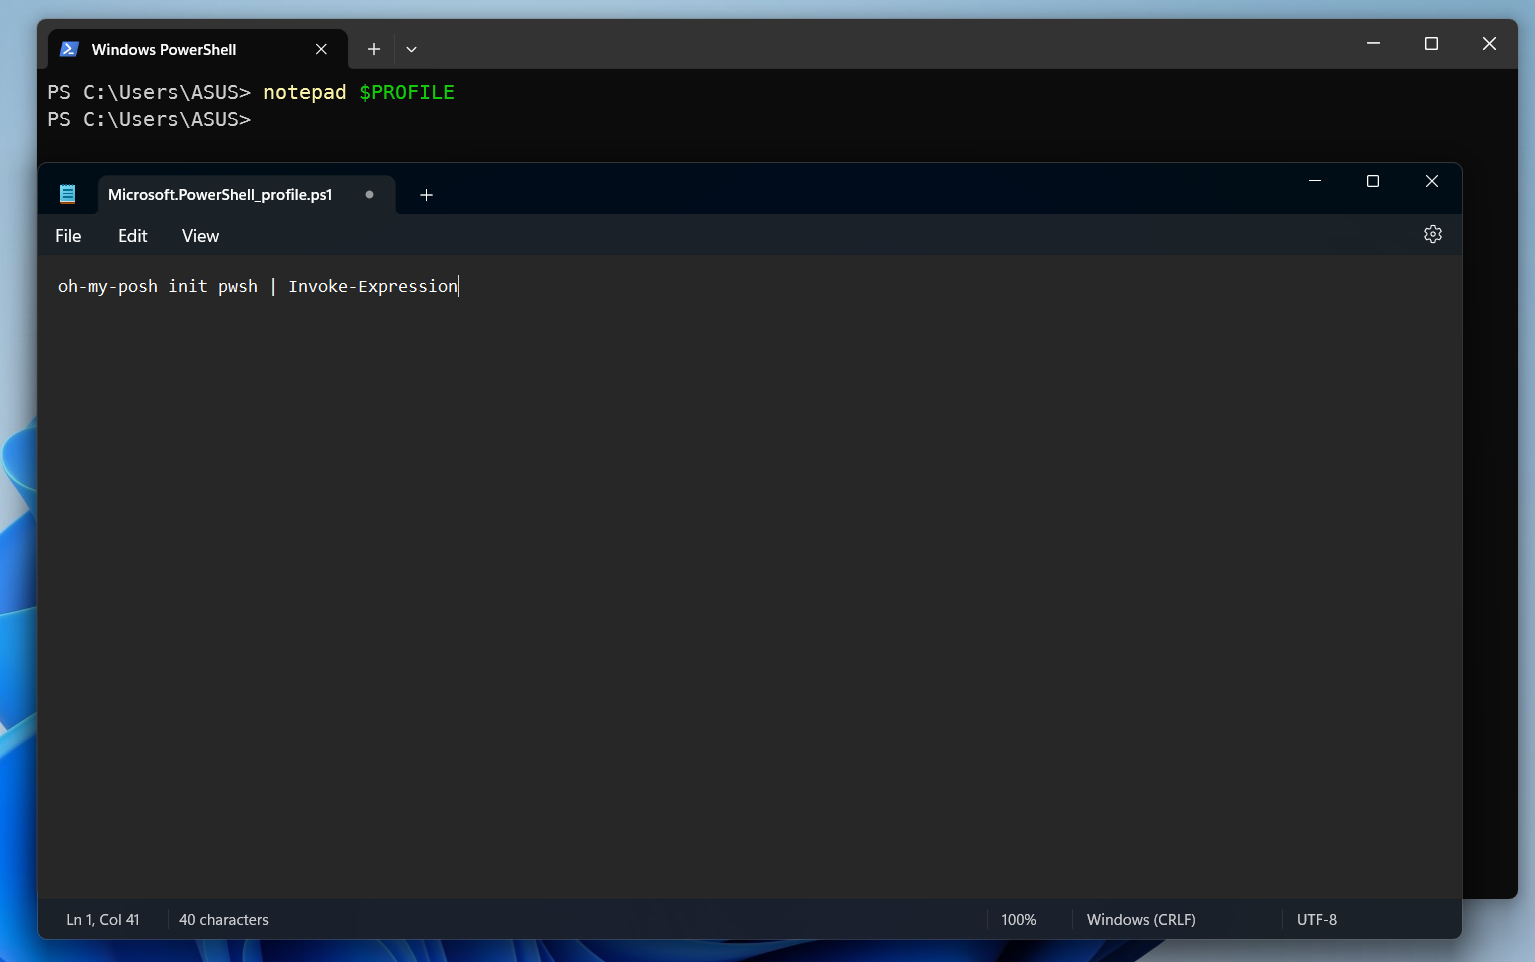
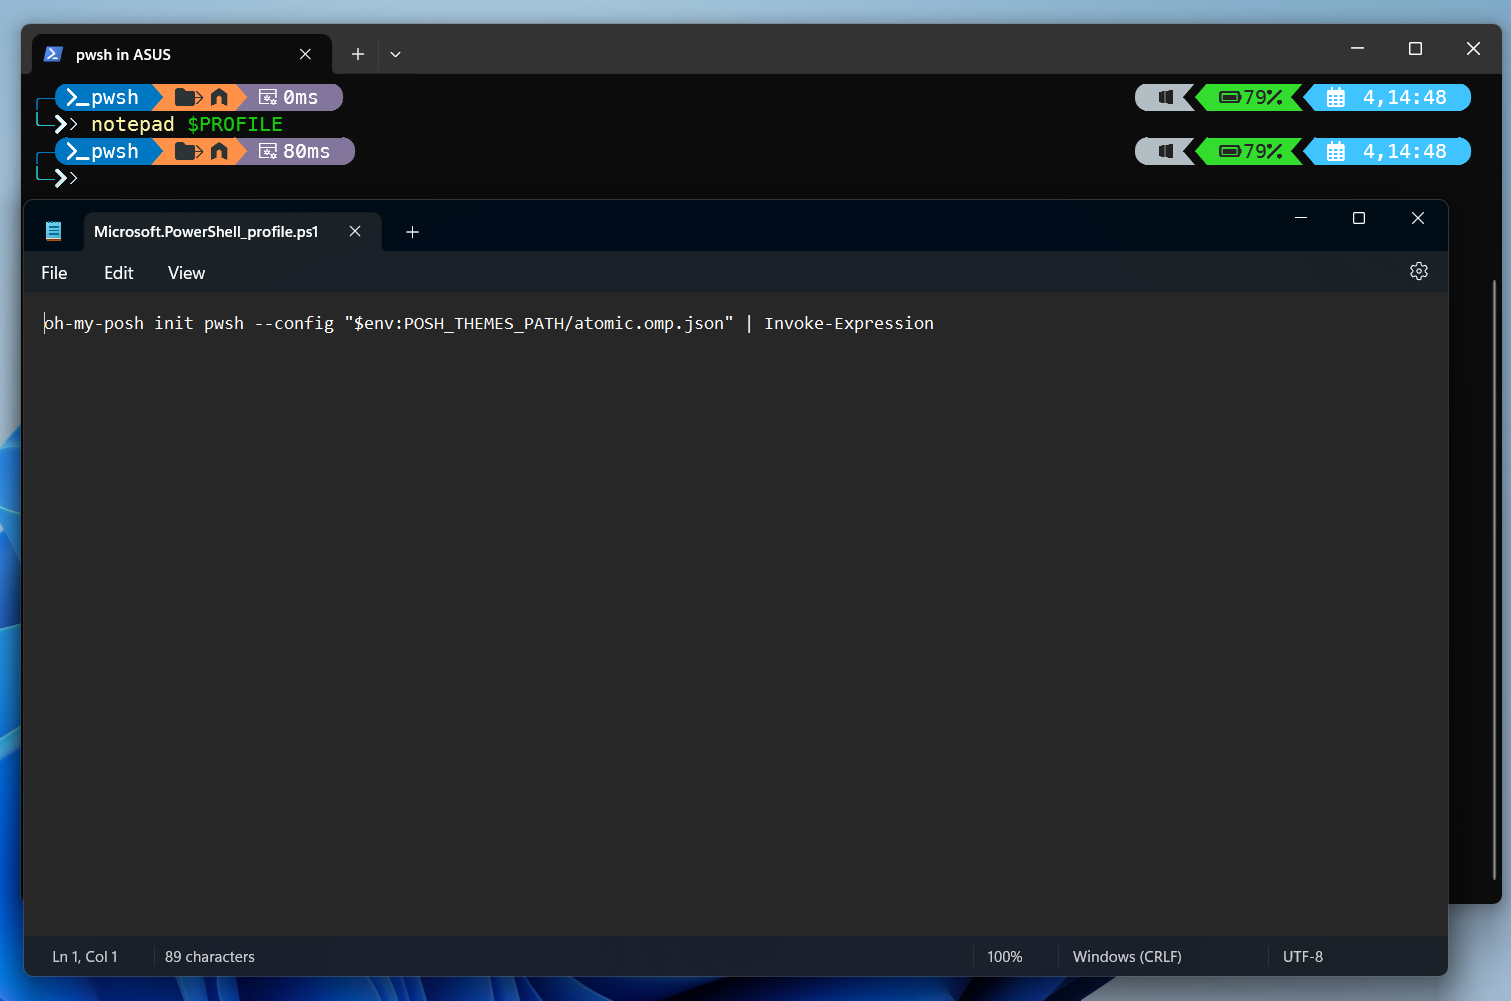
However, if you restart the Terminal, it will be gone. So, let’s make it the default shell theme for PowerShell. Open your PowerShell profile in a text editor. To open it in Notepad, run:
notepad $PROFILE
In case you don’t already have one, you’ll get a prompt to create one. Press “Yes.” Then enter the following line in the file:
oh-my-posh init pwsh | Invoke-Expression
Save the file and reload the profile with this command:
. $PROFILE
Using the above command may show an error about running scripts. In that case, run Set-ExecutionPolicy -ExecutionPolicy RemoteSigned -Scope LocalMachine as administrator first.
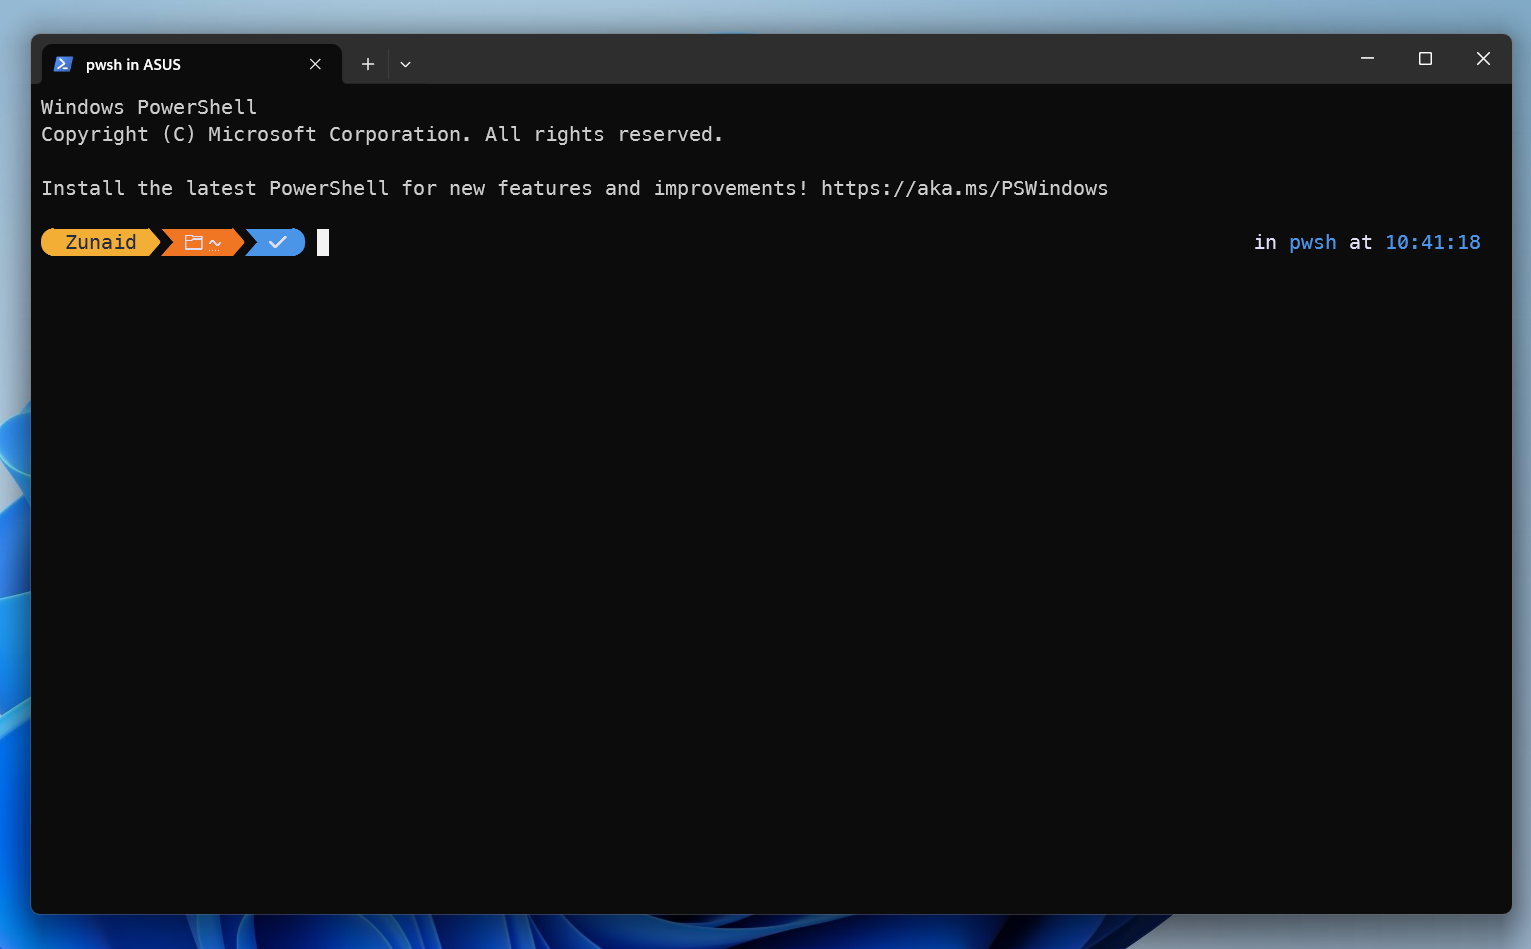
Now, whenever you open PowerShell, you’ll see the Oh My Posh custom prompt.
There are dozens of themes in Oh My Posh. To get a glance of all of them, run this in PowerShell:
Get-PoshThemes
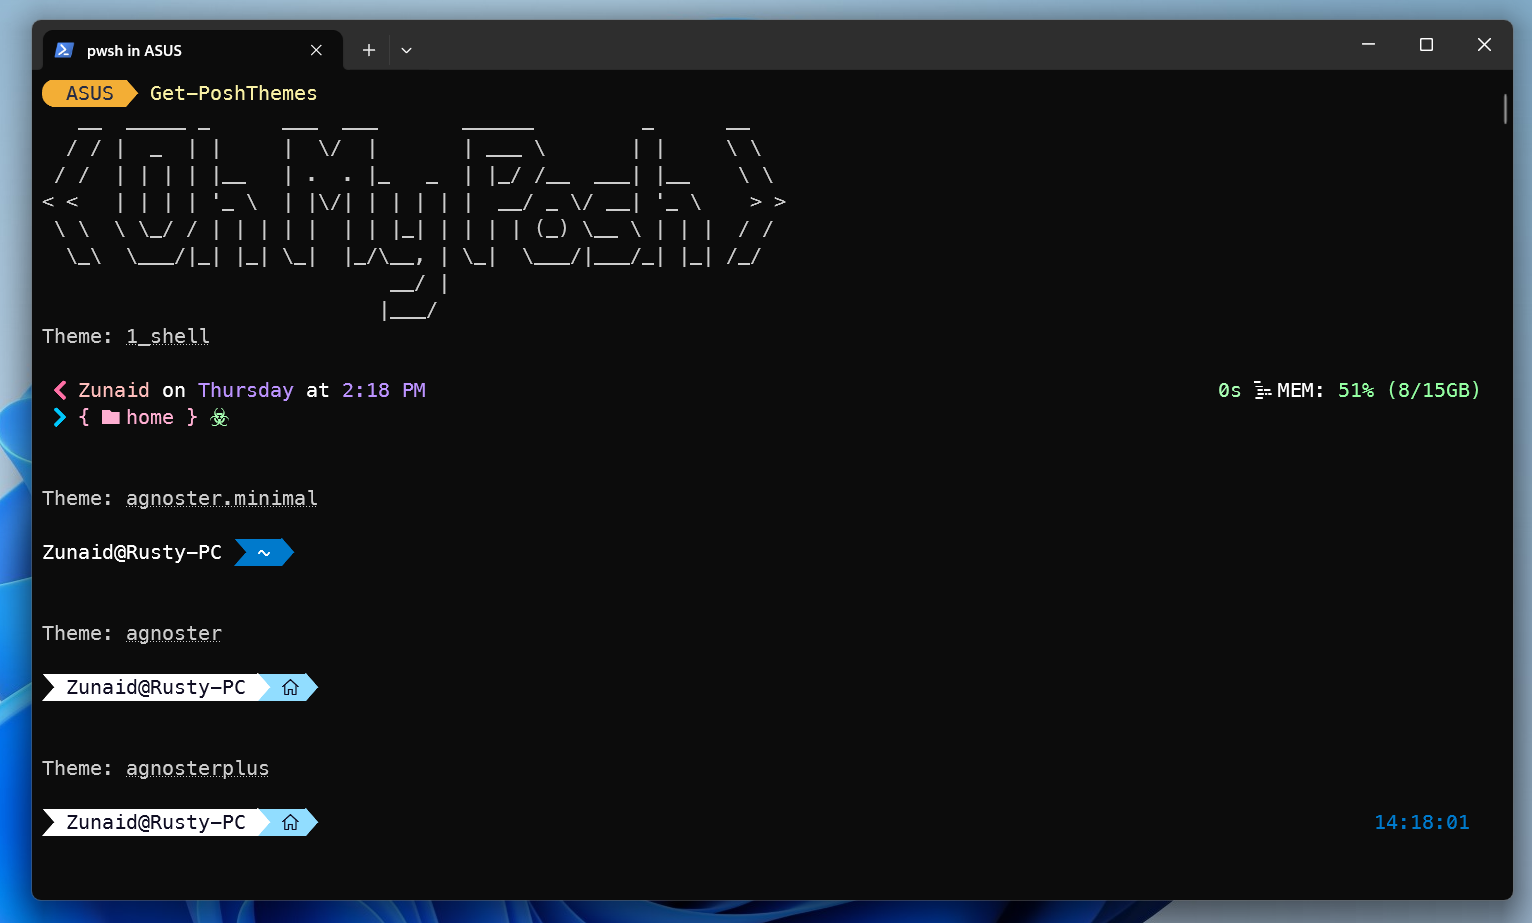
I really like the “atomic” theme, so I’ll switch to that. To switch the theme, I’ll run:
oh-my-posh init pwsh –config “$env:POSH_THEMES_PATH/atomic.omp.json” | Invoke-Expression
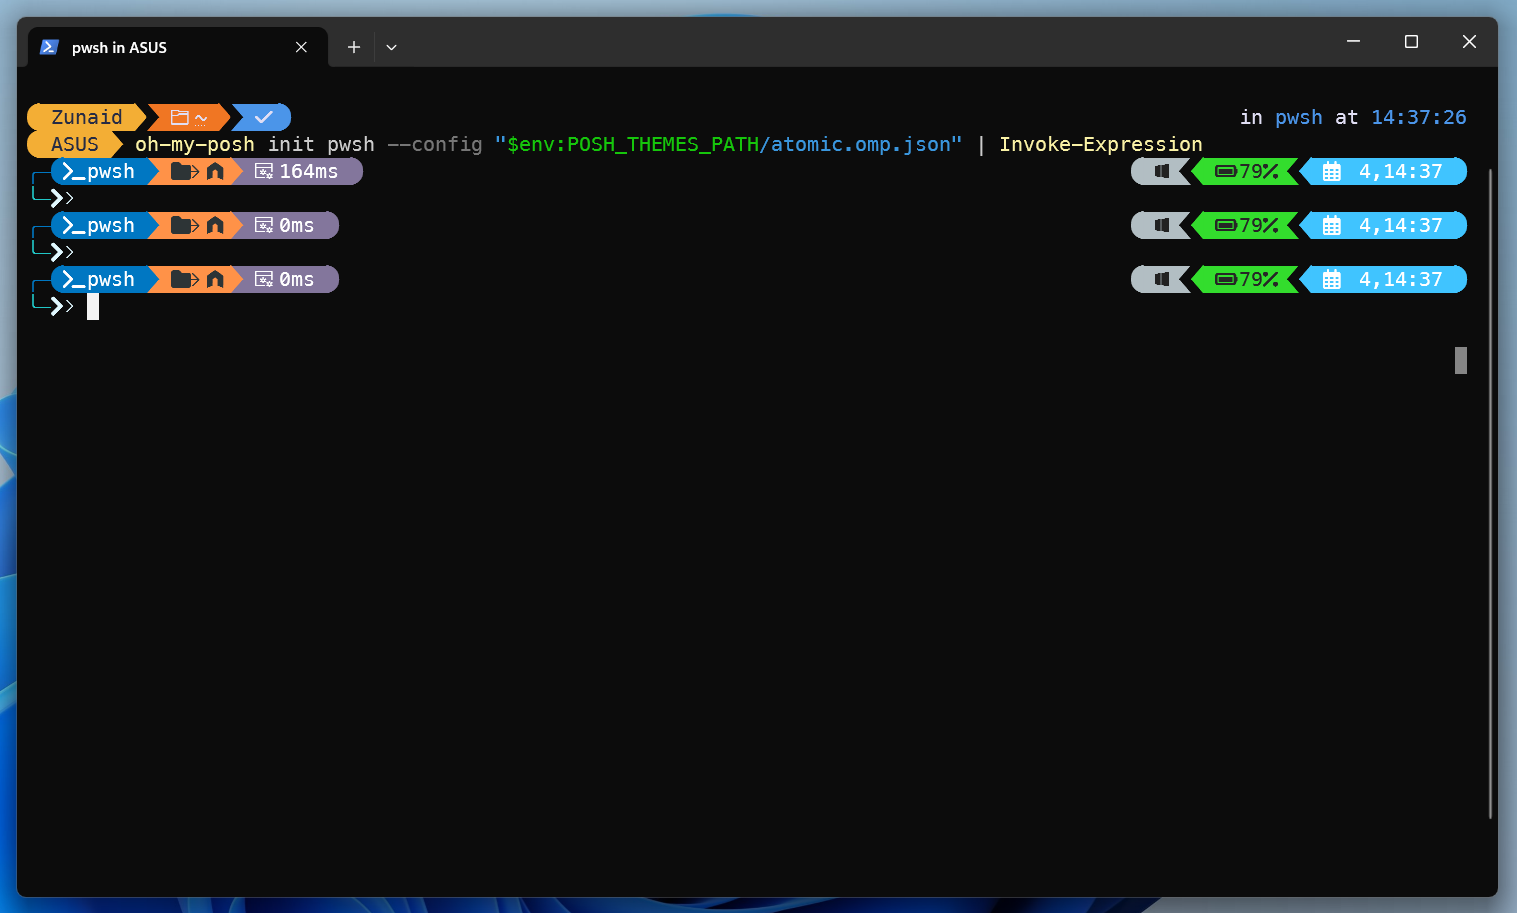
If you want to switch to another theme, just replace “atomic” with your theme name in the above script.
If you see an error about Get-PSReadLineKeyHandler, run Install-Module PsReadLine -Force as administrator first.
Once again, to make the change stay permanently, open the PowerShell profile file, remove the line you wrote previously and add the above line.
Then reload your profile with this command:
. $PROFILE
You can adjust existing themes by color, segments, and icons. First, you’ll need to export the theme as a JSON, YAML, or TOML file. Then you can edit that file to make changes and store it as a custom theme. You can even create your own themes in the same way.
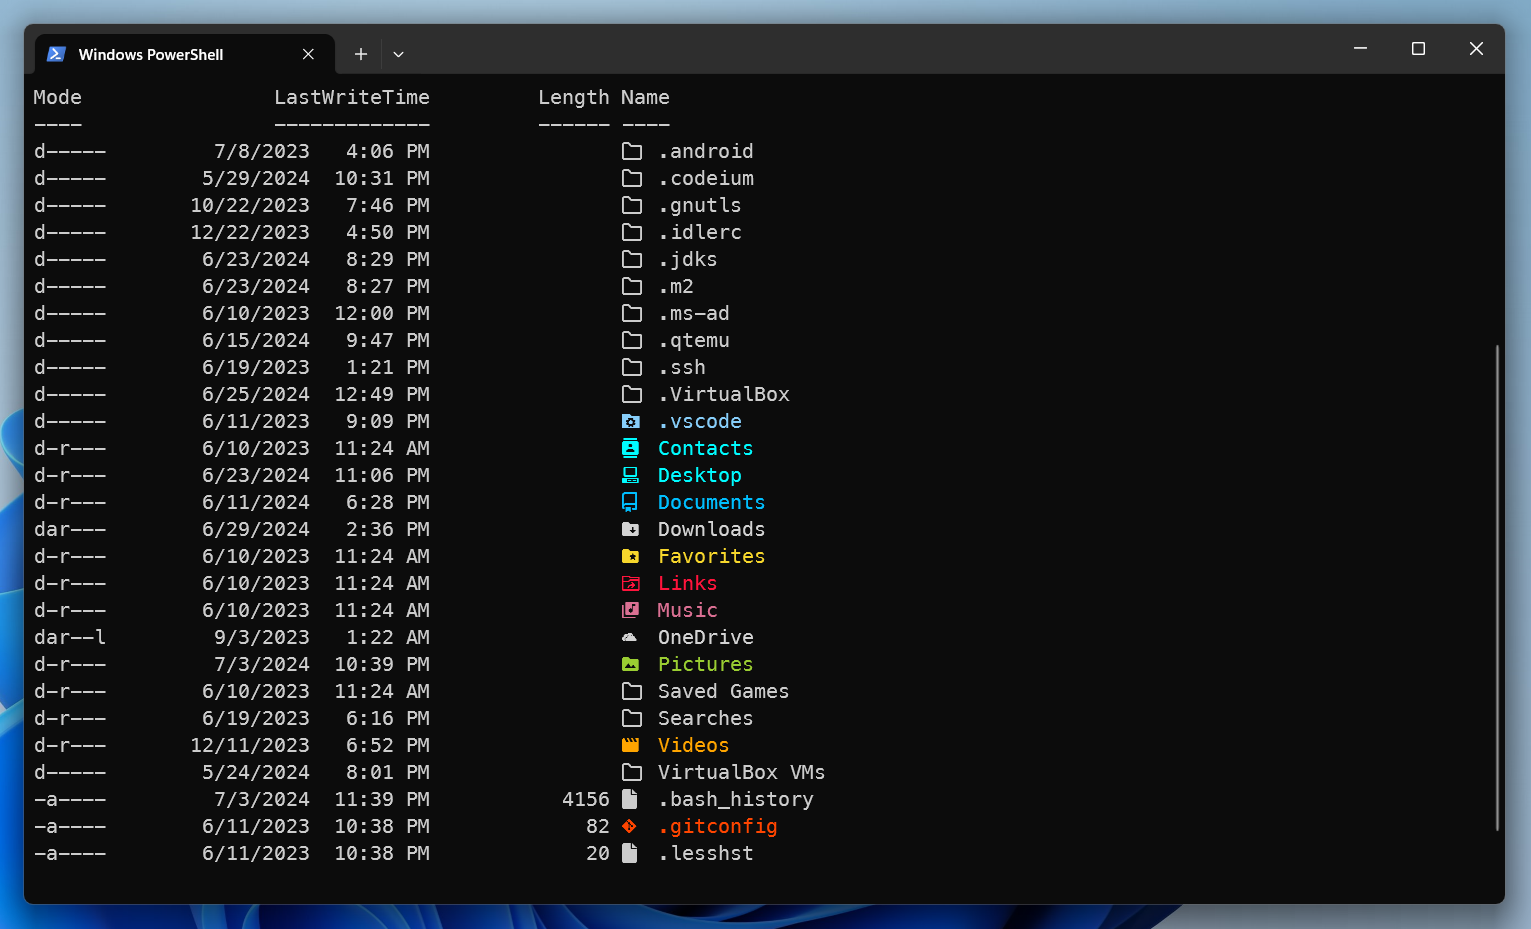
A little icing on the cake would be using custom icons in addition to custom fonts in the Terminal. Terminal-Icons , a PowerShell module, lets you add cool icons for folders, scripts, and other types of files. First, install the module with this command as administrator:
Install-Module -Name Terminal-Icons -Repository PSGallery
Then open your PowerShell profile with the command below:
notepad $PROFILE
Add the following line to the file:
Import-Module -Name Terminal-Icons
Save the file and relaunch PowerShell. Lastly, check out the icons by running ls in PowerShell.
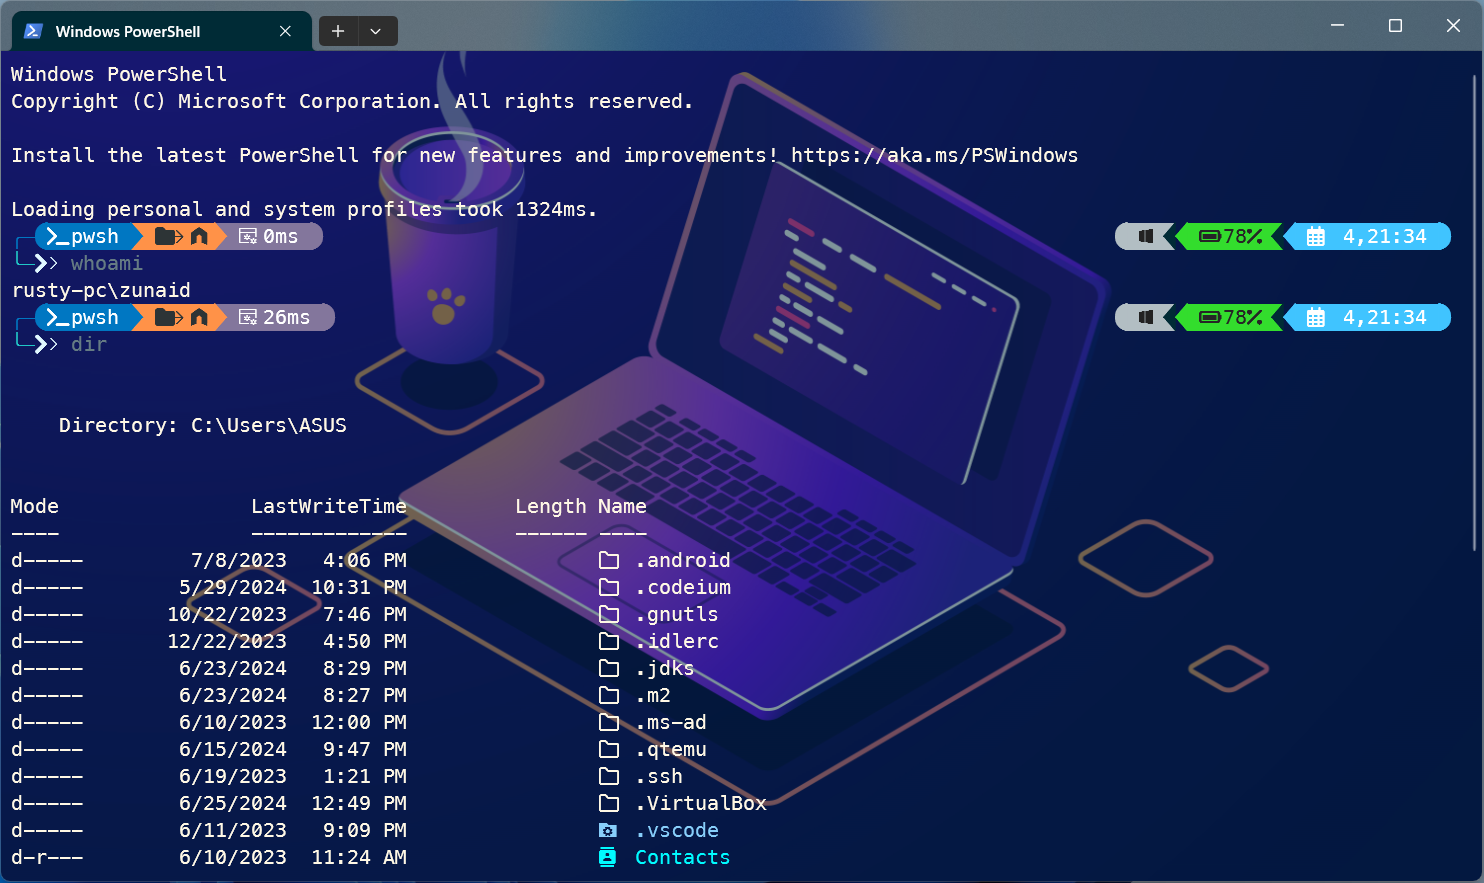
Combining everything so far, here’s my final result.
A Beautiful Windows Terminal at Your Service
By now, you should have a cool looking Terminal on your Windows computer. With some creativity, you can make it more flashy. If you’d like to read more on what you can do with Oh My Posh, check the official documentation .
Also read:
- [Updated] 2024 Approved Streamlining Instagram Story Captioning Techniques
- Advanced Tech The Most Reliable Webcams for Podcasters for 2024
- Dodge Scams: Authentic GPT Usage
- Each Sector Holds 512 Bytes, So:
- Expert Review: Unveiling the EcoFlow River III as a Standout Portable Powerhouse Ideal for Newcomers | Insights From ZDNET's Thorough Analysis
- How to share/fake gps on Uber for Nokia C12 Pro | Dr.fone
- In 2024, CatchEmAll Celebrate National Pokémon Day with Virtual Location On Tecno Camon 30 Pro 5G | Dr.fone
- In 2024, Image Editing Excellence with Top Apps List
- In 2024, Top 4 SIM Location Trackers To Easily Find Your Lost Infinix Smart 8 Device
- Maximizing Your Publishing Potential: How Many eBooks Can You Create with FlipBuilder?
- Possible ways to recover deleted files from Infinix Note 30 5G
- Professional Verified Guide to the Best Portable Chargers of 2024 | Wired
- Top Electric Vehicles in 202N: Comparing Model S, 3, X & Y - Insights From ZDNet
- Unbeatable Black Friday Deal: Jackery Explorer 1000 Inverter Generator - $250 Discount!
- ZDNet Unveils the Best Flashlights of 2024: Professional Reviews and Choices
- Title: Elevating Your Workflow: How I Enhanced the Visual Appeal of Windows Terminal
- Author: John
- Created at : 2024-12-21 04:00:05
- Updated at : 2024-12-25 20:06:14
- Link: https://techno-recovery.techidaily.com/elevating-your-workflow-how-i-enhanced-the-visual-appeal-of-windows-terminal/
- License: This work is licensed under CC BY-NC-SA 4.0.