
How to Fix Excessive RAM Consumption in Windows 11 Easily
Skype Can’t Connect: 5 Ways to Fix on Windows 11 Easily

Skype can’t connect
Skype sure is making our lives so much easier. But there are times when you can’t connect to Skype, and you’re seeing the message saying**Sorry, we couldn’t connect to Skype** , you’re not alone. Many Windows 10 users are reporting this problem as well. But no worries, it’s possible to fix.
Here are 4 fixes for you to try. You may not have to try them all; just work your way down until you find the one works for you.
Method 1:Check Skype Heartbeat
Method 2:Upgrade Skype to the latest version
Method 3:Check for Available Windows Update
Method 4:Refresh Network Settings
Method 5:Update Network Card Driver
1. Check Skype Heartbeat
If Skype is suddenly down, most of the case, the problem is not on your side. It could be Skype that is having issues. You can check Skype’s status by:
- Open Skype. ClickHelp , thenHeartbeat .
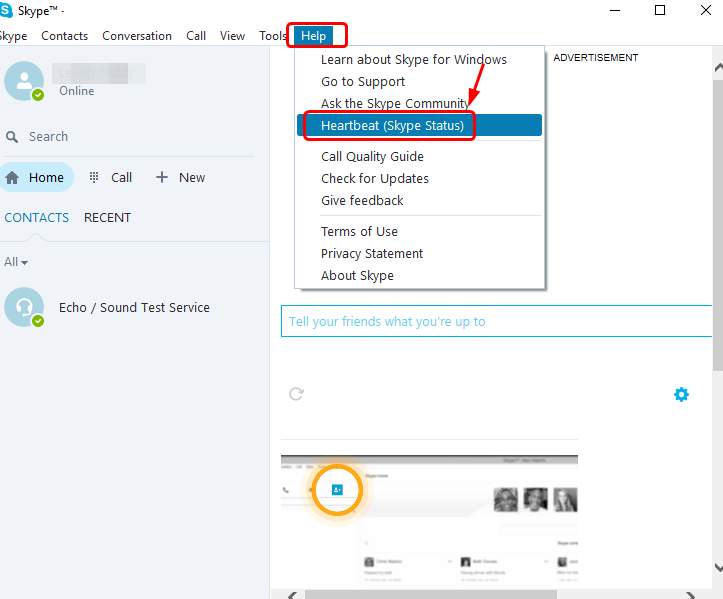
- You’ll see Skype’s system status from the newly opened web page. If something is wrong with Skype, you’ll see the message here.

- If you do see message concerning connection problem, all you can do is to wait for Skype technicians to solve it on their end.
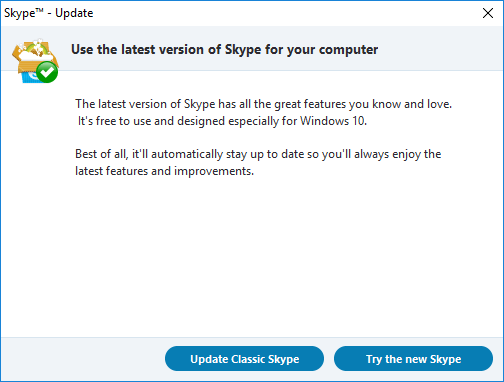
2. Upgrade Skype to the latest version
If you don’t see error message on Skype Heartbeat, then it’s time for you to upgrade your Skype.
- Open Skype. ClickHelp and thenCheck for updates .
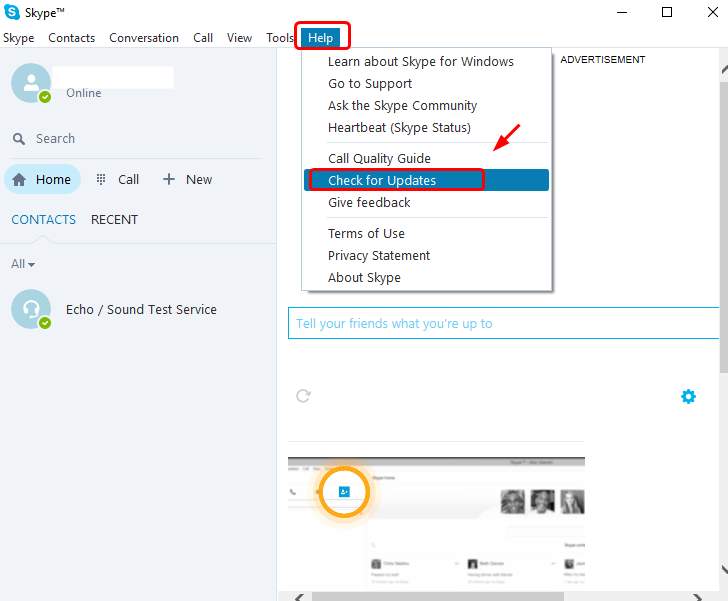
- ClickUpdate Classic Skype orTry the new Skype as per your own needs.
- You can also go the the official website of Skype to download the latest version from there.
3. Check for Available Windows Update
Outdated Windows Patches can be the cause of this problem. You can check for available updates by:
- On your keyboard, press theWindows logo key
 andI at the same time. ClickUpdate & security .
 andI at the same time. ClickUpdate & security .
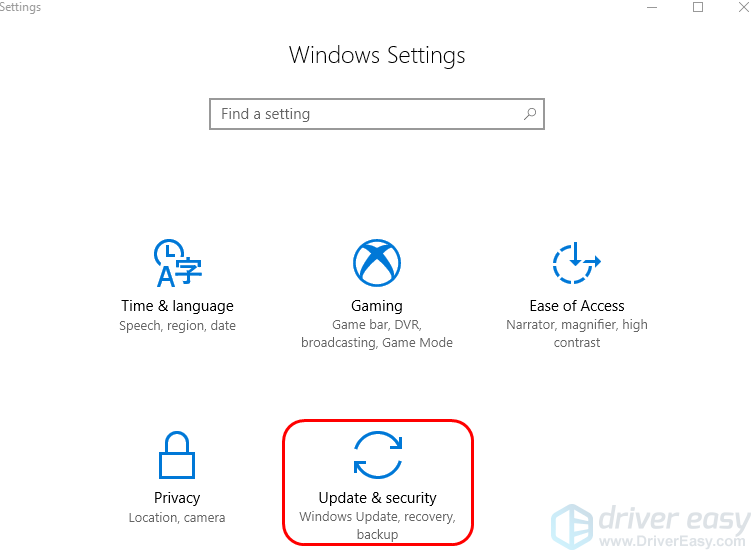
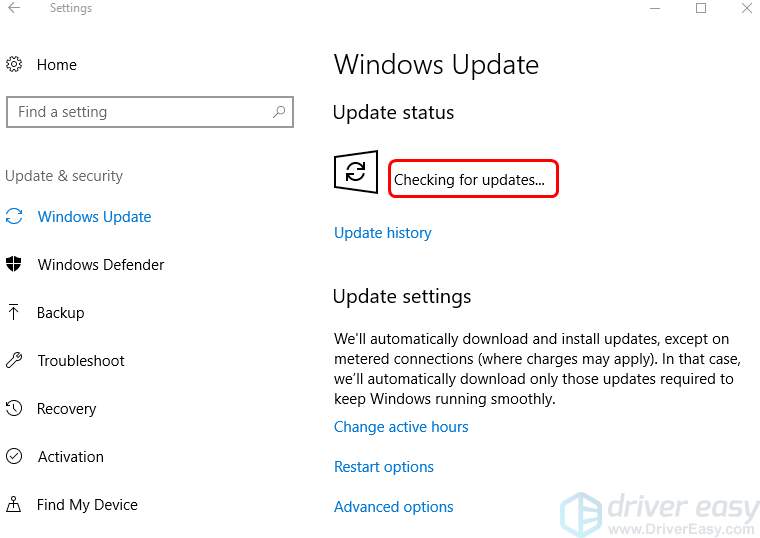
- ClickCheck for updates .
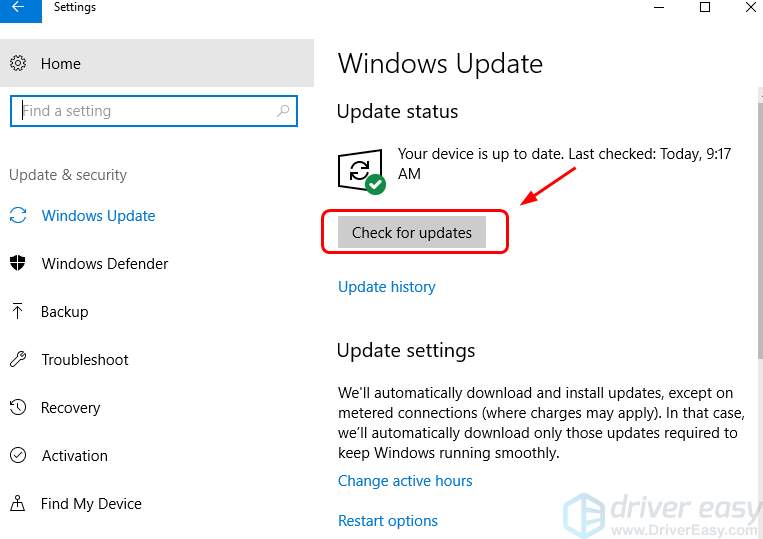
- Wait for Windows to search for and download available updates for you.
You may need to restart your PC for the changes to take effect.
See if your Skype is connecting now.
4. Refresh Network Settings
If you’re overloading your bandwidth by downloading files, you’ll have poor Skype connection. You can close all programs that requires intensive network usage to see if the problem is resolved. Or you can refresh your network settings to get it solved:
- On your keyboard, press Windows key andX at the same time, then clickCommand Prompt (Admin) .
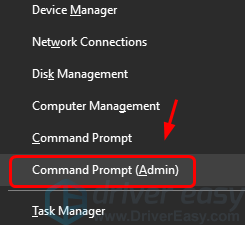
When prompted to give administrator permission, clickYes .
- Type the following commands. Make sure that you have made no typo and then press theEnter key on your keyboard after each command.
ipconfig /release;
ipconfig /renew;
netsh winsock reset;
netsh int ip reset;
ipconfig /flushdns;
ipconfig /registerdns;
netsh int tcp set heuristics disabled;
netsh int tcp set global autotuninglevel=disabled;
netsh int tcp set global rss=enabled;
netsh int tcp show global
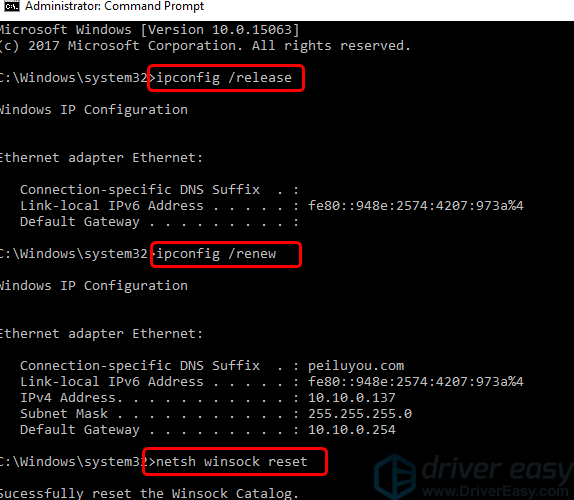
- Restart your computer.
5. Update Network Card Driver
This problem is probably caused by driver issues. The steps above may resolve it, but if they don’t, or you’re not confident playing around with drivers manually, you can do it automatically withDriver Easy .
Driver Easy will automatically recognize your system and find the correct drivers for it. You don’t need to know exactly what system your computer is running, you don’t need to risk downloading and installing the wrong driver, and you don’t need to worry about making a mistake when installing.
You can update your drivers automatically with either the FREE or the Pro version of Driver Easy. But with the Pro version it takes just 2 clicks (and you get full support and a 30-day money back guarantee):
1)Download and install Driver Easy.
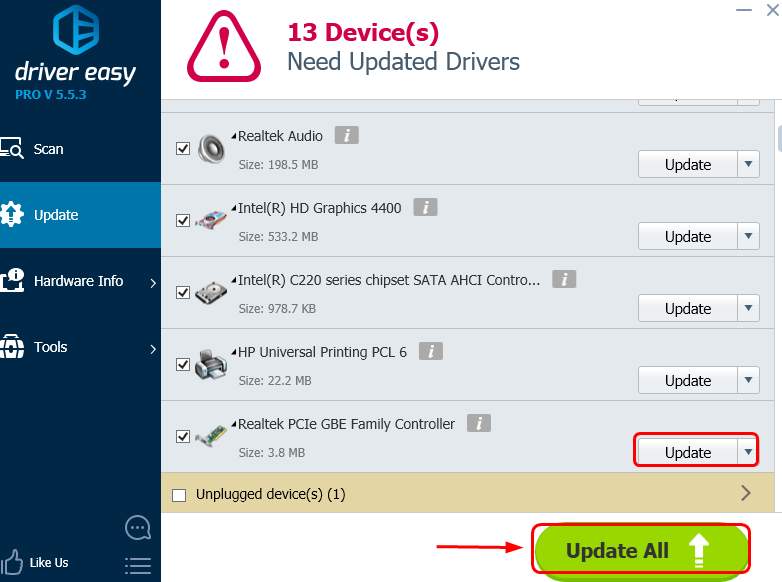
- Run Driver Easy and click theScan Now button. Driver Easy will then scan your computer and detect any problem drivers.

- Click theUpdate button next to the flagged network card device to automatically download and install the correct version of its driver (you can do this with the FREE version).
Or click Update All to automatically download and install the correct version of all the drivers that are missing or out of date on your system (this requires thePro version – you’ll be prompted to upgrade when you clickUpdate All ).
Also read:
- [New] Elevate Your Online Presence Conquer 10 Key SMM Steps Today for 2024
- [Updated] 2024 Approved QuickTweet Clip Swiftly Gather Social Media Vids
- [Updated] The Ultimate Pathway Autoplay YouTube Videos Within FB Networks for 2024
- Efficient Backup of Camera Roll to Share via Snapchat
- Finding Vanished Contact Information in Your Android's Address Book
- Free Methods to Reduce Your Videos' Size: Optimize for Twitter Sharing
- Harmonizing Movement with Music Instagram's Reel Synergy Guide for 2024
- How Do You Get Sun Stone Evolutions in Pokémon For Infinix Note 30? | Dr.fone
- How to Factory Reset Lava Blaze 2 5G If I Forgot Security Code or Password? | Dr.fone
- How to Migrate Android Data From Xiaomi Civi 3 to New Android Phone? | Dr.fone
- How to Obtain the Latest Free Drivers for NVIDIA’s 3D Vision Technology on Windows
- How to Rectify the Invisible Wi-Fi Network Dilemma?
- Learn Quickly with These 10 Beginner Secrets to Navigating X, the Successor of Twitter
- Overcoming the Challenge of a Non-Existent Microsoft Visual C++ Redistributable DLL
- Smooth Setup Tutorial: Syncing AirPods Earbuds with an HP Desktop or Laptop System
- Solutions for Resolving d3dx9_25.dll Missing File Issue
- Stream On, Stream Strong: The Ultimate Trio of Applications Every Twitcher Needs
- The Ultimate List of Queer Entertainment: Top Netflix Shows for the LGBTQ Community in July 2024
- The Ultimate Tutorial for Locking InstaChats Into Place
- Title: How to Fix Excessive RAM Consumption in Windows 11 Easily
- Author: John
- Created at : 2025-02-27 17:45:01
- Updated at : 2025-03-02 21:44:01
- Link: https://techno-recovery.techidaily.com/how-to-fix-excessive-ram-consumption-in-windows-11-easily/
- License: This work is licensed under CC BY-NC-SA 4.0.